We knew that there was at least one hatch which leaked on Yacht A Fun when we purchased the boat. One of my first major efforts was to eliminate that leak. Scott of the Windtravler Blog had recommended butyl tape vs. caulk. I found him to be spot on!
Why “adhesive silicon based caulk sealant” is such a bad choice for bedding hatches is best revealed by what it takes to un-bedding a hatch. It took me multiple tools and approaches to just get it to release. Then there was the 2 1/2 hours Diann spent scraping the caulk from the hatch rim.
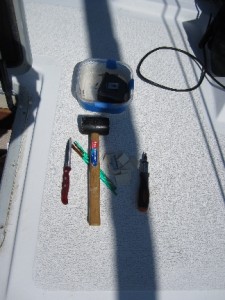
The process started as I used a paring knife, driven by a rubber mallet, for the two sides I could reach.
Then I was blocked from further effort by the upturn of the deck on the inward and hinge sides of the hatch. So…….. we went into town to find a tool.
Mitchell’s Hardware is known by boaters as being “the place” to go for odd items and extra service. My example is an excellent testimony to the customer focus of the store.

Too sad………. Greg passed early in the morning of January 29th, 2018 at his store. Over a 1,000 people attended the memorial service at the convention center.
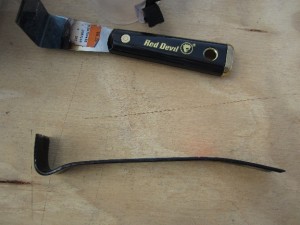
To gouge out the hard to reach caulk, I needed a putty knife that is bent 90 degrees and has about a one inch wide blade on its tip. That format did not exist, but a Red Devil brand knife did have a slight bend with its tip the right width. Greg Smith, the owner allowed me to use his back of store vice and a propane torch to heat the putty knife and hammer the blade to the 90 degree angle I needed. It took five cycles of incremental “heat & bend” to do the job without overheating the metal. I also bought a miniature pry bar.
Having other customers to serve, Glenn left me unsupervised to do whatever I needed to customize the $6.29 Red Devil putty knife- using his vice, hammer, and propane!
When complemented on the service, Glenn explained that he does such extras for boating customers on a regular basis.
Diann and I returned to the boat and proceeded to use the new tool. To keep from banging my fingers with the rubber mallet, I used a small adjustable plumber’s wrentch to hold the handle. That worked well for a while. Then I realized I had gotten tired and let the tool dig down to fiberglass. Ouch, Time to quit for the day.
Problem was- it would rain through the rest of the midweek. So….. I put a cut plastic sheet over the hatch and taped it down. The taped plastic cover held out the rain.
Wednesday we drove, in the rain, to Morehead City and visited Ace Marine Supply. They stock “ReLease”- a $40+ spay which breaks down the chemical bond of caulks. That spray became part of our solution to releasing the hatch from the deck.
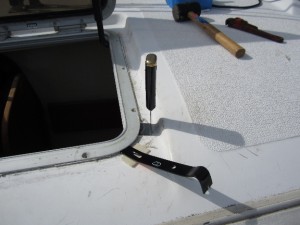
Friday number two, I was able to get the hatch to release from the deck- but it took a miniature pry bar, the 90 degree angle putty knife, multiple spays of ReLease, wood wedges made from cut paint stir sticks, and a fair amount of willpower and words.
Butyl tape is the alternative. If one needs to pull a hatch, the tape will stretch and finally turn loose. Cleaning it off the deck should be a snap by comparison to the effort needed for removing silicone caulk.
Granted, placing butyl tape does take more planning than squirting out a bead of caulk. One should snug the screws down and wait a short while before tightening again. That allows the caulk to ooze out from the two surfaces. So there’s more time used for installing a hatch when using tape. In the total scheme of things though, being able to quickly remove a hatch and get the job done in one day sure beats what I have experienced with silicone caulk bedded hatches. Butyl tape allows for faster release and rebedding of hatches and ports.
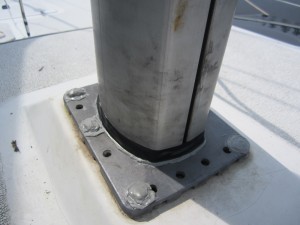
When Diann and I returned in early August, the hatch showed no signs of leaking- though we found the mast-step area was doing so. You may have guessed………. I used butyl tape on it.
It rained on and off the balance of that week. No drips fell onto our mattress!


