A simple task shouldn’t take too long. Right?
Following is “Part One” of a “simple” hot water heater story. Day numbers are sequential, not necessarily full eight hour work days.
When Yacht A Fun, our Gemini sailing catamaran was purchased, we knew from the survey that the hot water heater didn’t work. Though the assumption was that the element was all that was bad, the price of the boat was reduced $275 to offset the price of an original equipment new water heater, if needed. Labor could, however, be costly in that the water heater was under the generator (it’s a boat- so “space is a premium”).
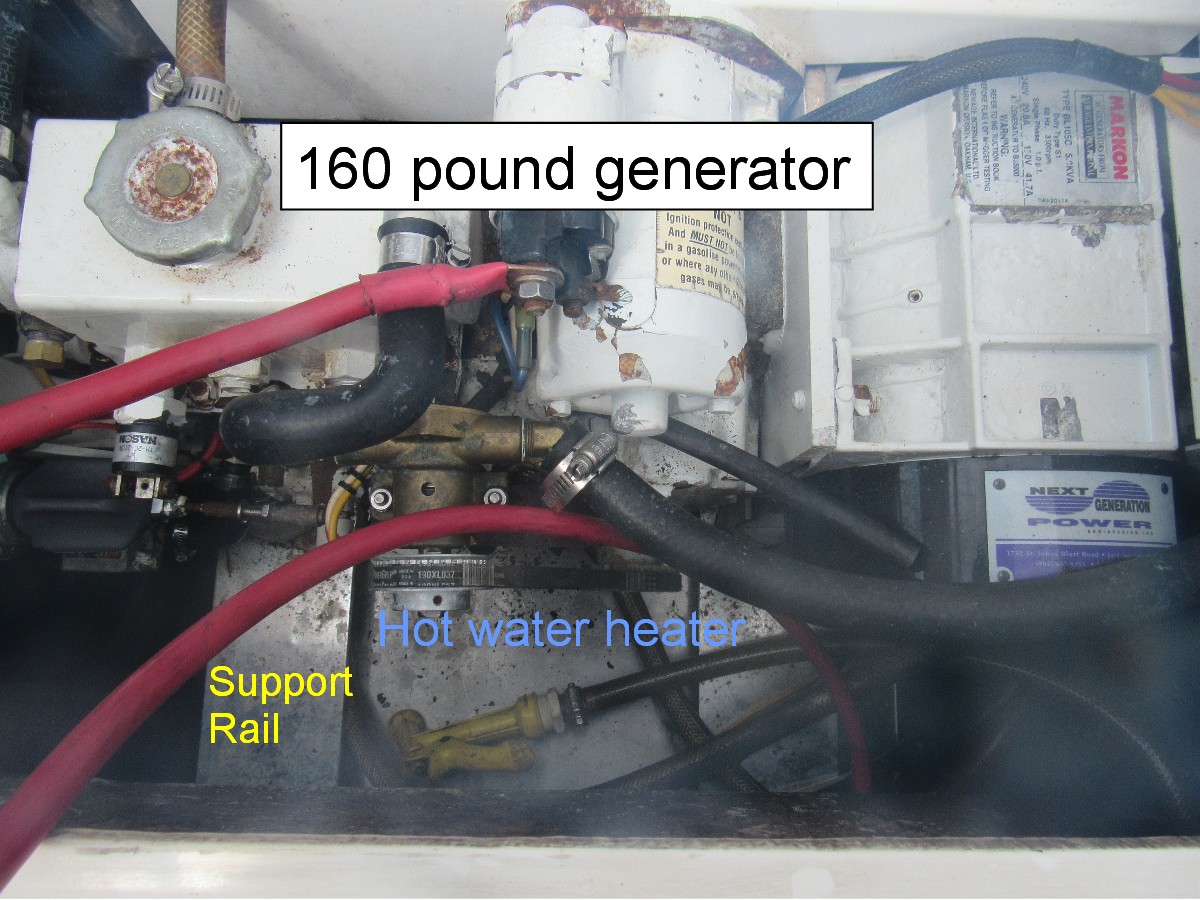
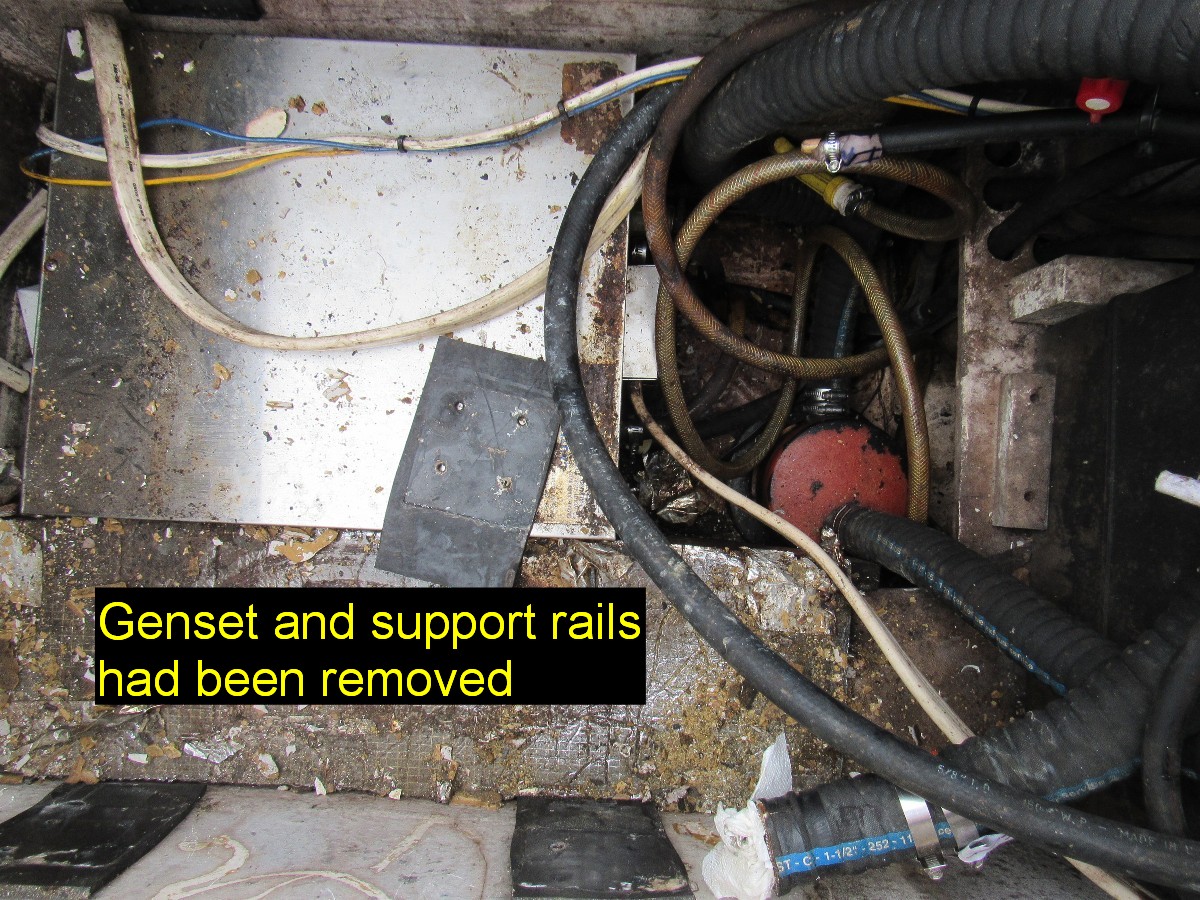
Starboard Stern Locker contains 3.5 KW diesel genset mounted over hot water heater
As it turned out, the element was indeed bad, but primarily because the bilge of the locker had previously flooded to the level of the water heater’s electrical parts. Seaward brand water heaters use fiberglass insulation- so the fiberglass no longer had thermal value having been soaked in oily water. How nice !
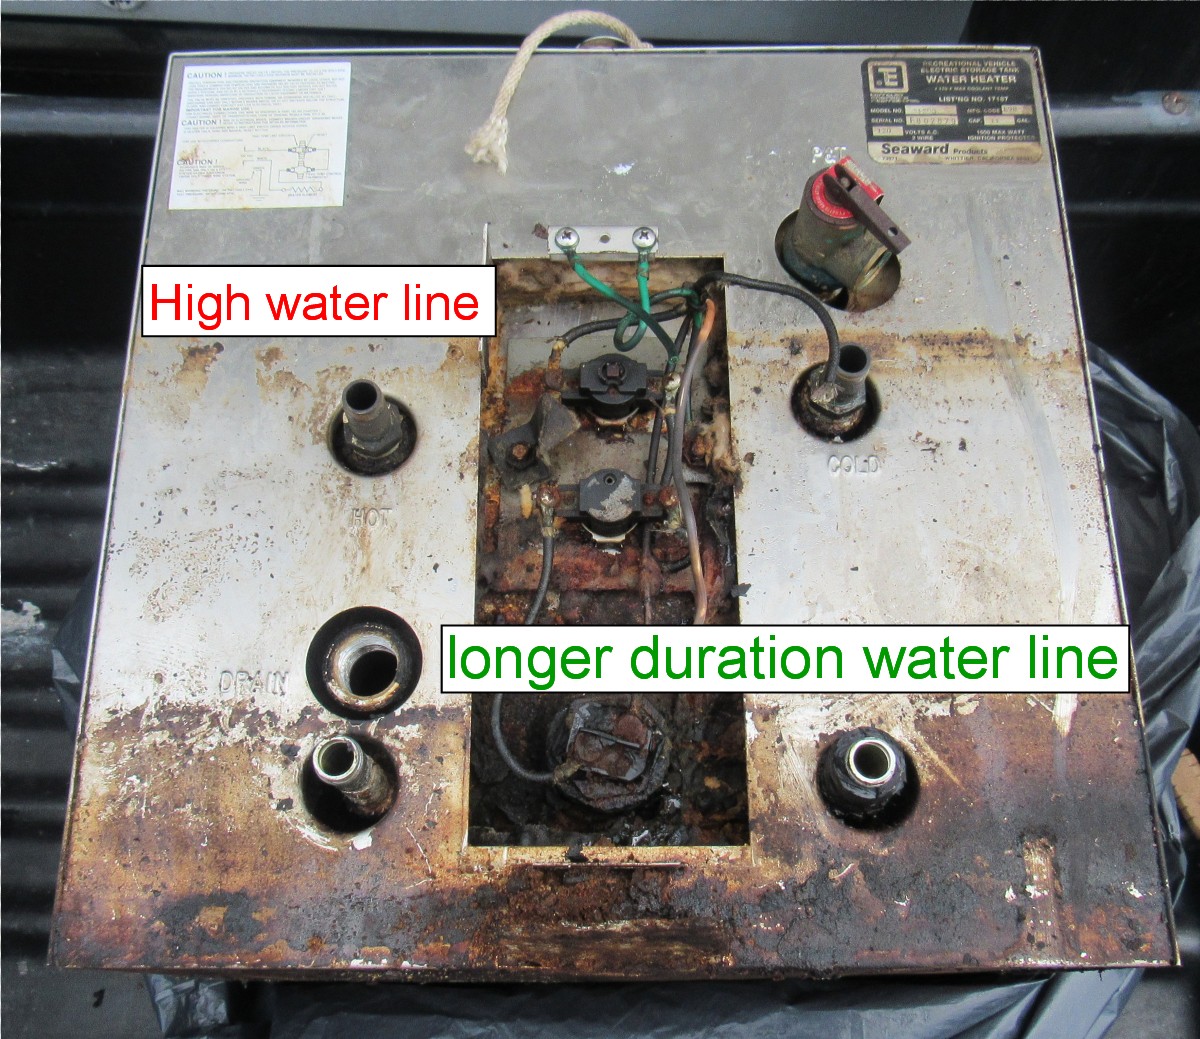
Water lines on Seaward unit
We didn’t have enough time, while in Oriental before our departure date, to pull the genset to in turn remove the water heater. So, that sequence was simply put on hold. Hot water has been via our propane stove. Sink baths have been our primary onboard bathing activity. Occasionally, when privacy has been available, we’ve used a 2 gallon dedicated garden sprayer as our cockpit shower. Most of our showers have been at mooring facilities and at marinas- and those have usually been great.
The quoted boat yard minimum labor cost of pulling, and reinstalling, the genset and hot water heater was $2,500 ! At $75 per hour, that estimated amount allows for 33 hours of work- then the bill grows. I figured I’d do the work myself.
Granted, a boat yard would have a traveling lift with which to raise the genset out of its locker. But it’s not unusual for there to be a “lift charge” as an add-on to the attendant labor charge of operating it. The lifting task is really a two man task, as well, due to the genset being 28 inches long and the locker opening being only 24 inches. One person controls the lifting motion while the second person rotates the genset to tilt and pass it up and out of the hole. Man hours, just a flying.
Having been a Licensed General Contractor in North Carolina, I felt I have enough skills and logic to do the process – with some help. On that basis I set out, now here in Southport, to conserve $2,500 of cruising funds.
A piece of one day revolved around starting the genset so as to know it still worked before it was removed. First, I bled the Banjo fuel fitting to be sure there wasn’t air in the fuel line. Yet, it didn’t start. I wasn’t prepared to test the working of the glow plug, and sought help from the Owner’s Manual.
Though the manual indicated a decompression lever exits, I’d not previously been able to see it (even with a mirror on a stick). On this day, I still didn’t see it. After a break and another read of the owner’s manual I decided to feel the engine rather than look at it. Feeling-up an engine just seemed, well…..different. But, like a teat on a cow- there the decompression lever was.
With Diann working the starter switch, and me holding the decompression lever open, the engine turned at a fast pace. When the lever was popped closed, the resulting diesel compression fired the genset with no problem. Water flowed out the exhaust and it was wonderful.
A piece of the next day was used to remove the generator’s incoming and outgoing fuel connections; remove the incoming raw water hose; remove the exhaust hose; disconnect the DC wiring harness; disconnect the AC wiring harness; plug the incoming fuel line’s end; remove the nuts holding the genset to the vibration isolator’s four attachment points; and coil and ZipTie as much of the resulting “tentacles” as I could.
More of day two was spent regarding the gantry that would be built to support the double pulley system which would lift the genset. The gantry measurements had to be developed; parts from the marina’s repurpose lumber pile had to be brought to Yacht A Fun’s work float; 2x4s and fasteners had to be acquired from Lowes Hardware.

Our all purpose work float
On part of day three we used a jig saw to cut the material and used deck screws to assemble the gantry.
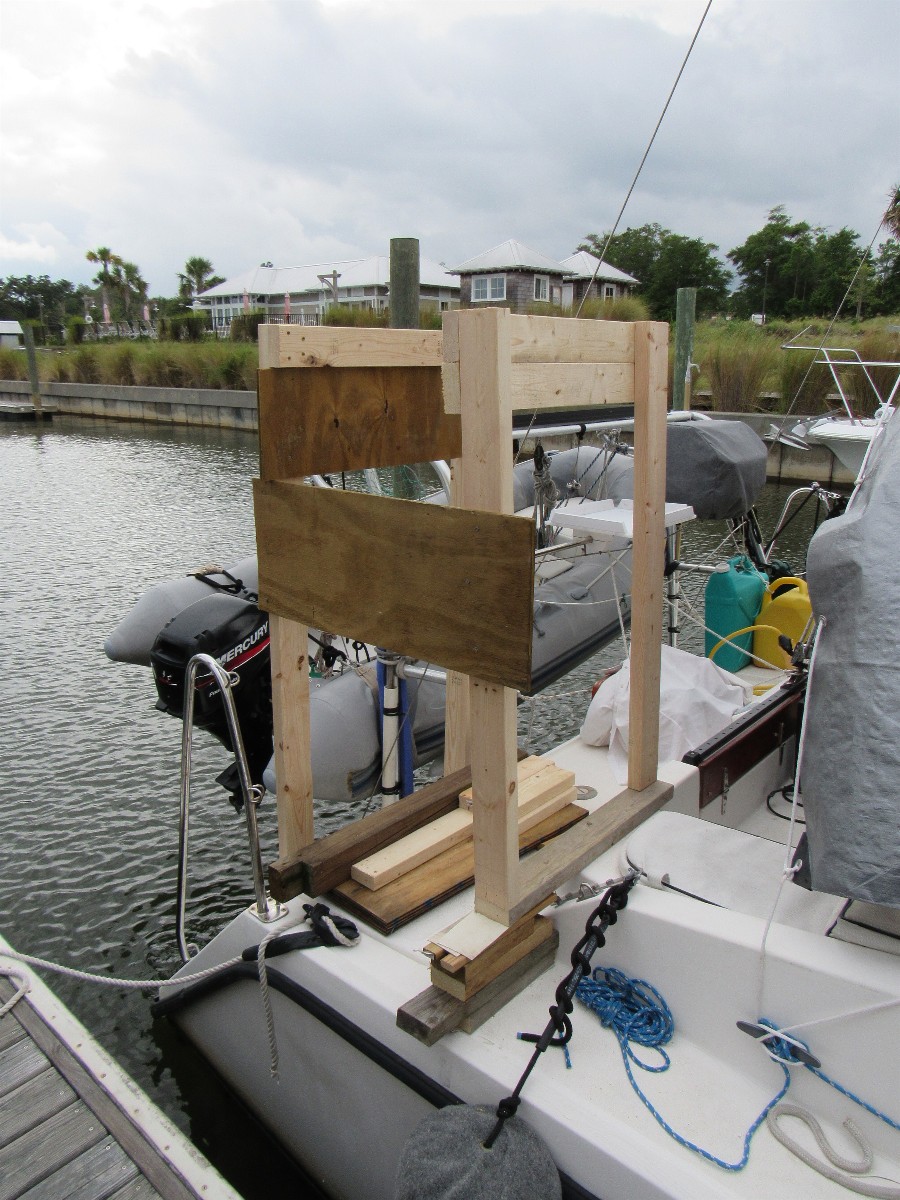
Gantry before beam and pullies were attached
Workday four we had help from a boat friend here at Deep Point. The genset was pulled and then placed on plywood resting on milk crates under the catamaran’s bimini top.
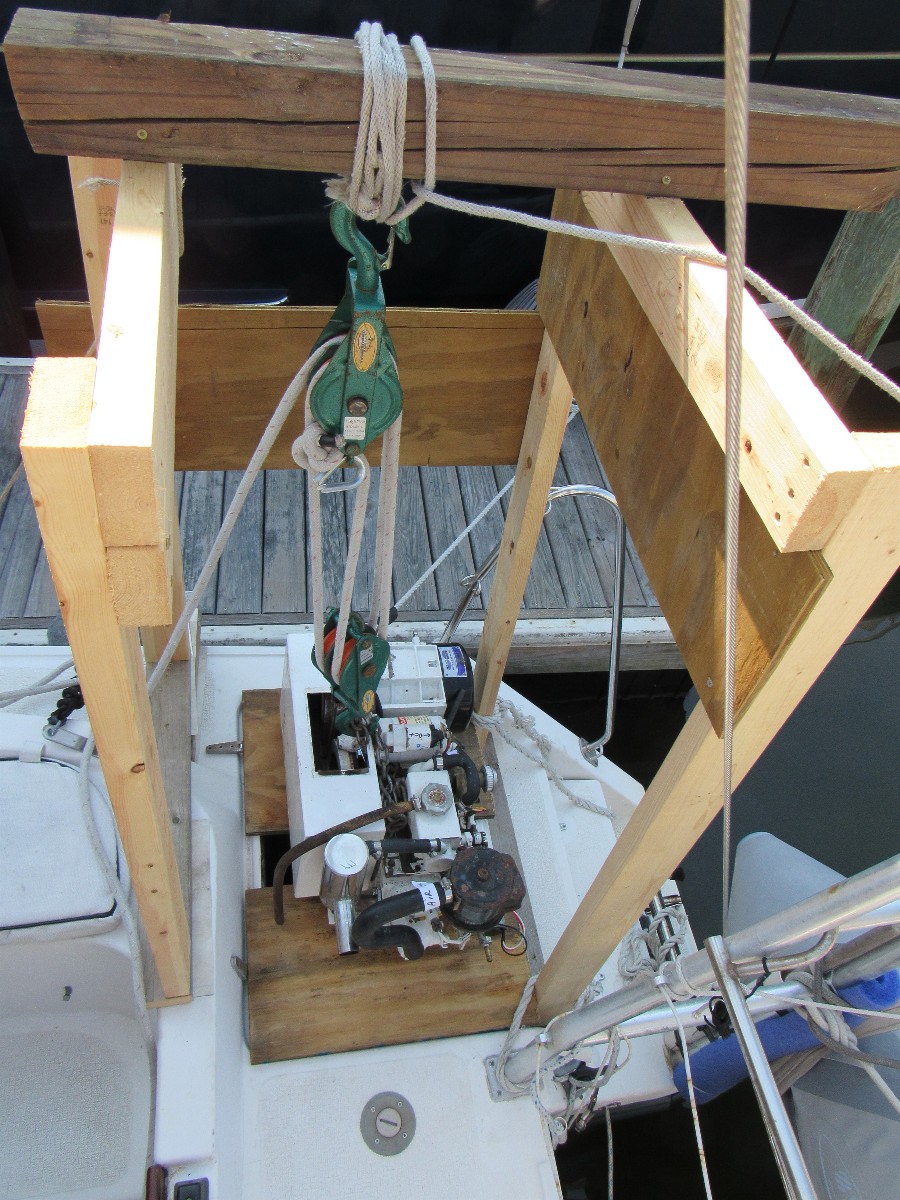
Genset- out of the locker and resting on plywood
After a short break I spent more time than one would imagine to remove the pair of custom aluminum support rails on which the genset had been bolted. Eight bolts were “nutted” under the rear stairs. Diann had to use a Phillips screw driver to hold the locker side of the bolts as I sat on the bottom step (my legs dangling in the water) and felt under the second step to ratchet the nuts off. To get to the other eight nuts, that were on the berth side of the starboard locker wall, we had to remove most of the items stored there and detach the wall paneling to reveal the nuts.
Water heater now ready to be removed
Before cooking dinner, all the removed stuff had to be put back into the storage berth.
…………And non-cruising folks just don’t understand why projects take so long!!
Day five the water heater was removed. As a caution, I plugged the incoming cold water line so the boat’s water system could be turned back on. The idea was a good one. However, the bathroom sink’s mixing faucet with shower style spigot threw us a curve that night. At some point, one of us had slightly opened the hot water faucet side of the faucet/mixer which allowed the cold water to cross through the faucet mixer and get pushed back down what is normally the incoming hot water. The tank end of that line had not been plugged.

Pressurized cold water inlet hose had been plugged
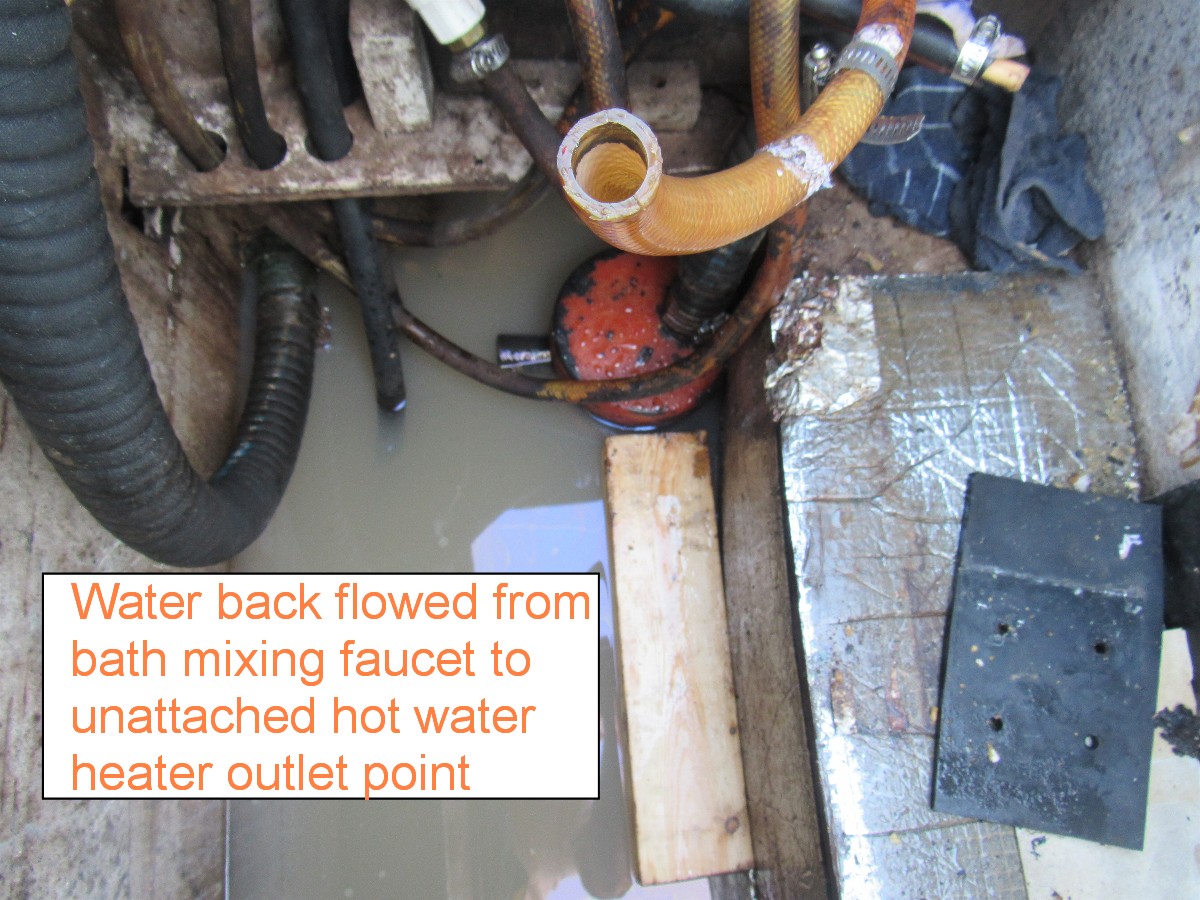
Unattached hot outlet hose had not been plugged

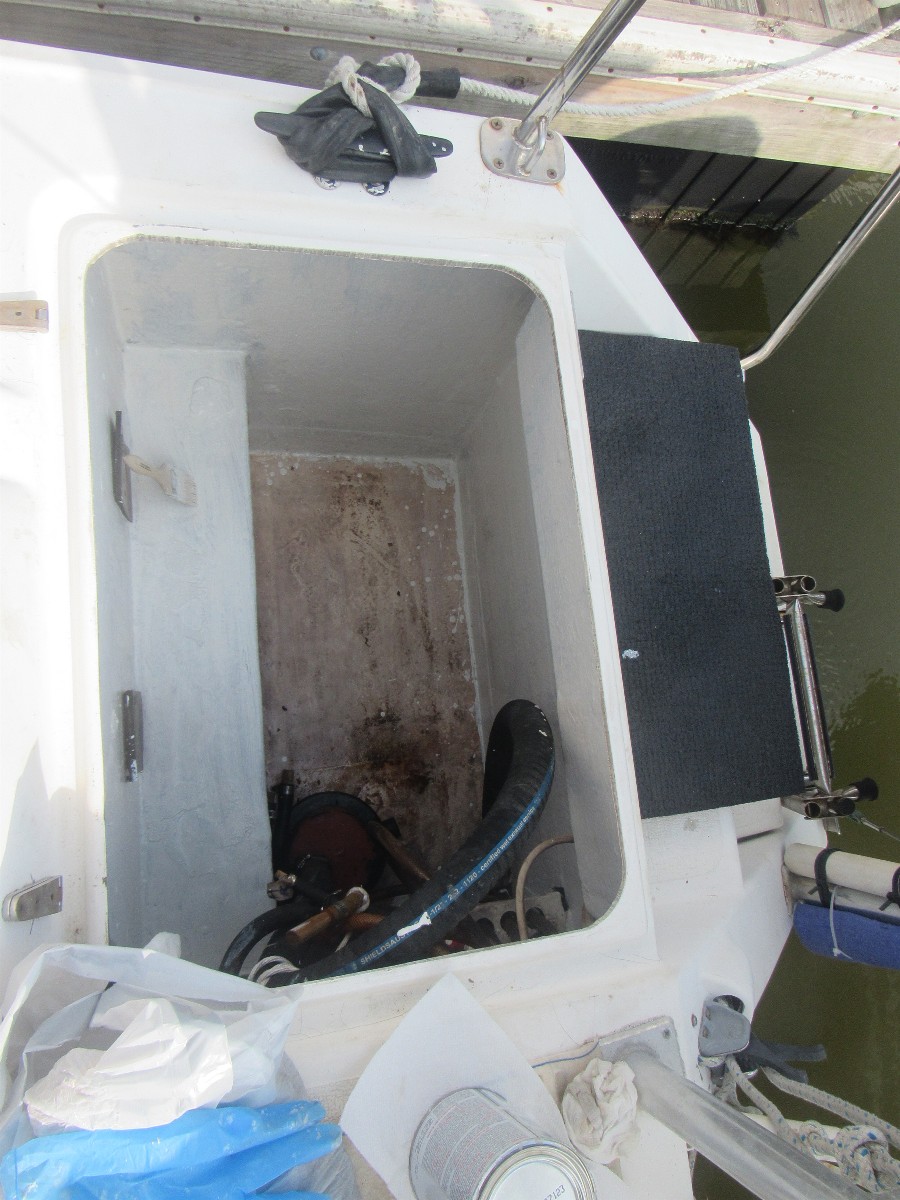
Water in the locker before scrub down
With the air conditioner compressor and fan running full tilt, neither of us heard the water pump running, all night! Some 25 gallons of water got pumped back into the locker. It was from that experience that I better understood how water might have previously, somehow, accidentally flooded that space.
Day six was spent cleaning the locker in preparation for paining it.
Day seven was Kilz primer day. Since the locker is small compared to adult body size, one has to paint sections and get out while that area dries. Then reenter the locker to access the unpainted area. To do otherwise would have wet paint wiped all over your body and clothes.
Locker Walls painted with Kilz oil base as a primer
Day eight was begun by calling Isotemp about their hot water heaters and e-Marine about their dual element 12volt DC & 120 volt AC heater element. The hot part of the day was spent working on photos and beginning this blog post. The after-six PM cooler temperature time became Rustoleum finish coat painting time.
Day nine began with final research of Kumma, Seaward, and Isotemp water heaters. Since Kumma and Seaward versions have fiberglass insulation, they would need to be elevated to prevent possible water damage from the bilge of the locker. Isotemp units have a foam insulation that can handle moisture, and have scald prevention mixing valves. Though the Isotemp tank price is higher, the final price is actually lower than when parts ancillary to the Kumma and Seaward tanks are added such as: locker bilge pump, elevated base, and mixing valve for scald prevention.
While waiting for return calls from vendors, I put the final coat of paint to the bottom of the locker. 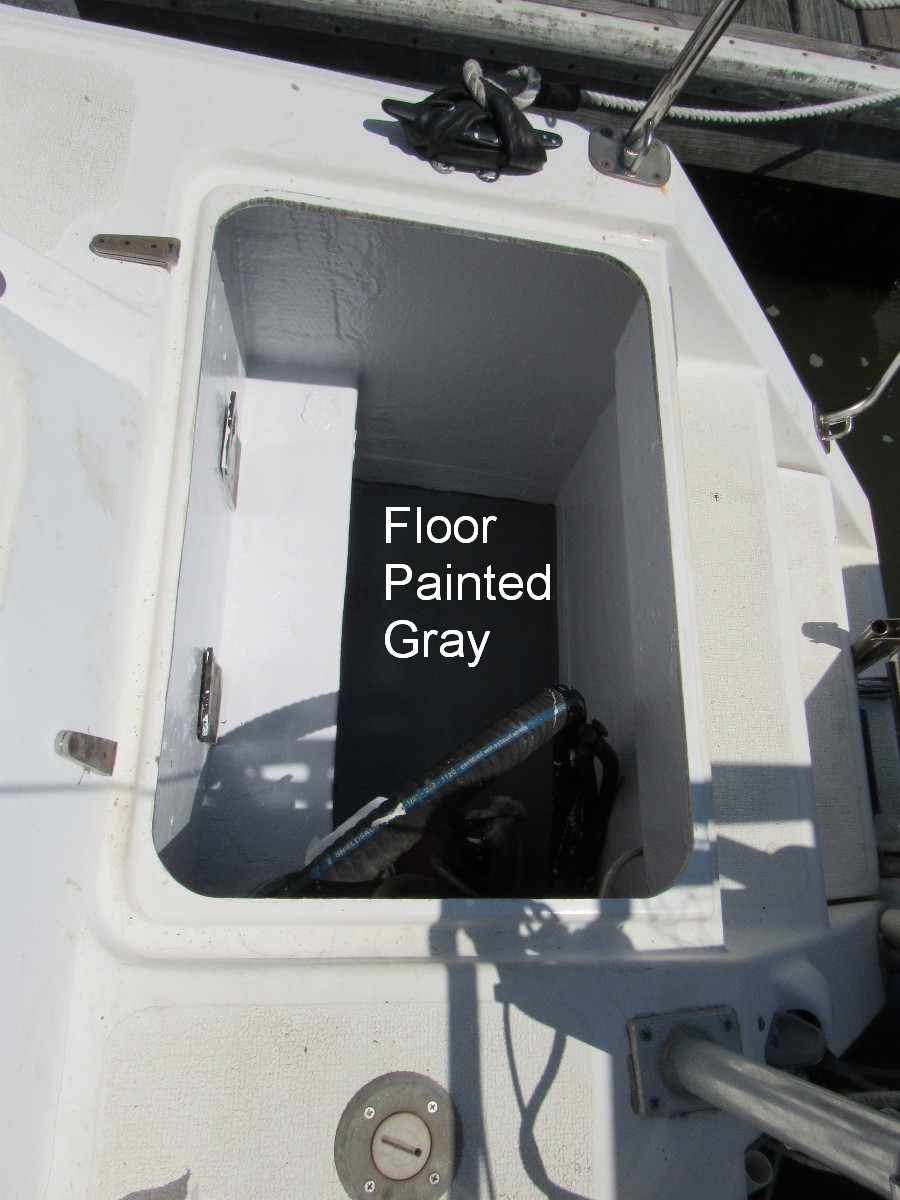
By 4PM the Isotemp water heater had been ordered, as well as the combination 12 volt DC / 120 volt AC heater element.
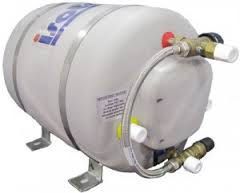
8 Gallon Isotemp hot water heater with mixing valve
The water heater should arrive in one week. The element is back ordered at e-Marine and so it may not come until month’s end.
With the water heater tasks under control, we can next focus on scraping flaking paint from the genset and getting it maintained before reinstallation.
I’ll give you a hint at the next round of maintenance “fun”- the genset’s vibration mounts need replacing, as do the exhaust hoses. The rubber, of the mounts and the hoses, have deteriorated, as one would expect given the unit’s age. It’s nothing major, but needed maintenance takes time away from needed recreation.

Genset water pump support plate will be replaced.
I’m headed to the marina’s pool……………..