One of the attributes of our particular Gemini sailing catamaran is the heavy duty davit rack that came with the boat. I had recognized, however, that the davit’s mounting feet were smaller than I would have designed- but then I tend to over build when doing something myself. The starboard foot, on the sloping surface, didn’t sit flat to the fiberglass.
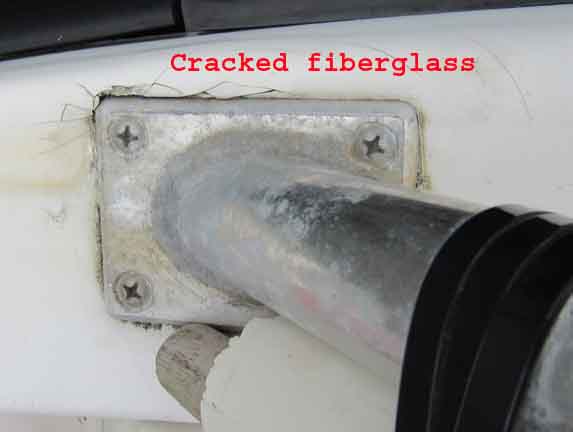
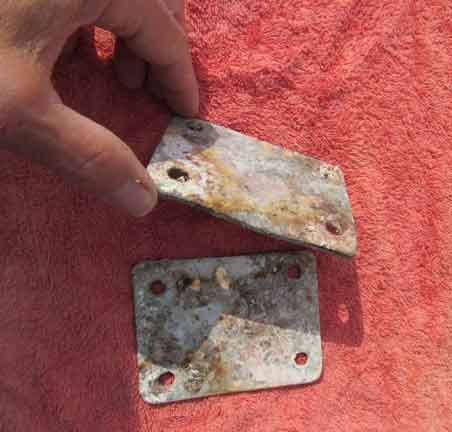
Apparently when we were off shore in heavy seas the point of the starboard foot worked into the supporting fiberglass. The crack was discovered when I took off the split blue swim noodle I had repurposed as a chafe guard for the dinghy when swung from the davit. Had I not replaced the sun-aged noodle, I’d have missed the damaged glass and eventually had a serious issue.
The solution was to have large backing plates made; cushion / support the new plates with 3M 4200; and force epoxy between the davit feet and outer backing plate.
Tim Ehling, from Tim’s Towers, in Southport, came to the boat to view the davit and confirm the needed plate sizes. A week later I had the plates. His work is first rate. His charge was a value.
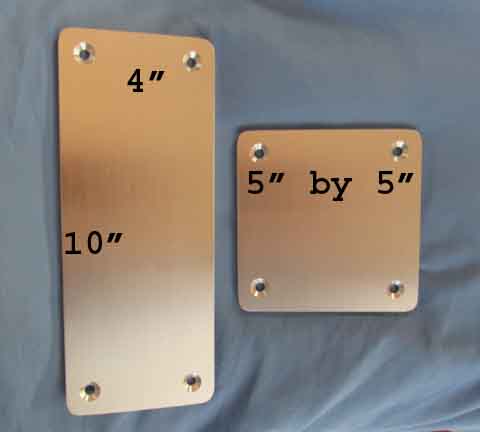
New Plates
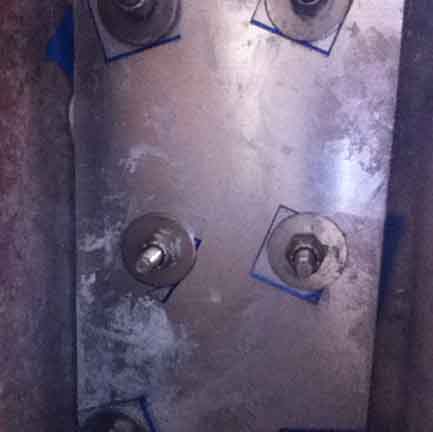
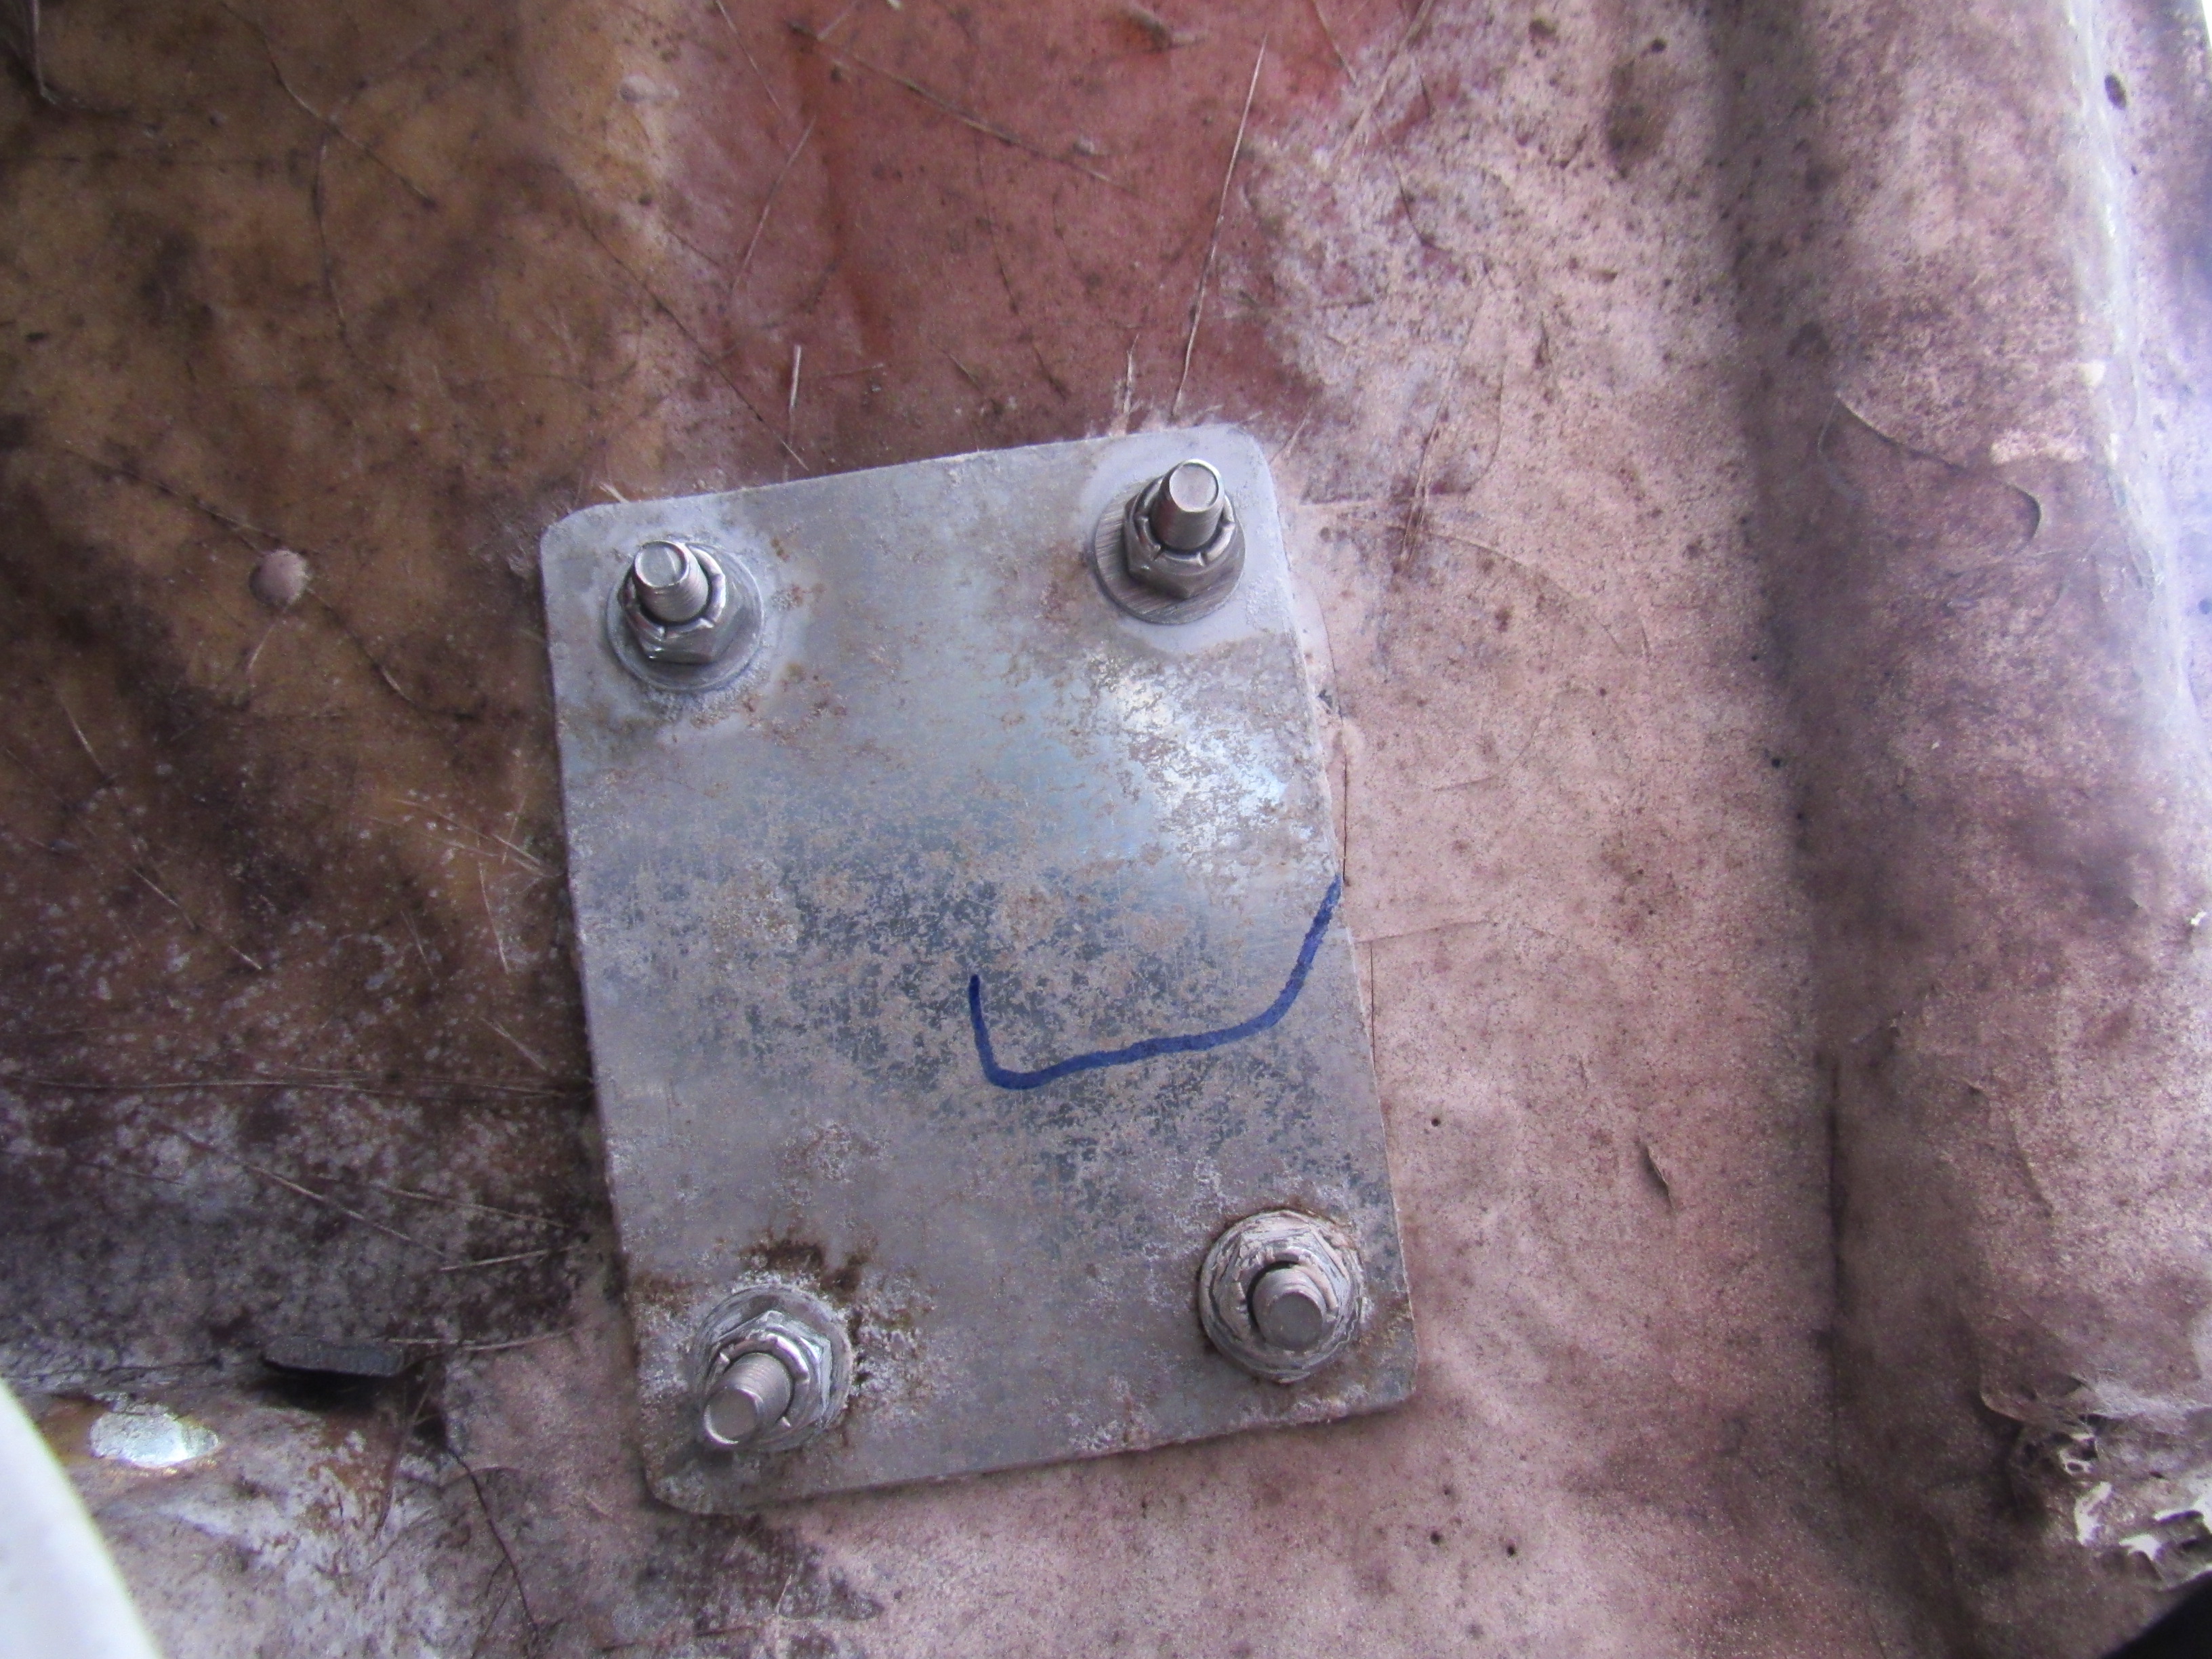
Backer plate installed
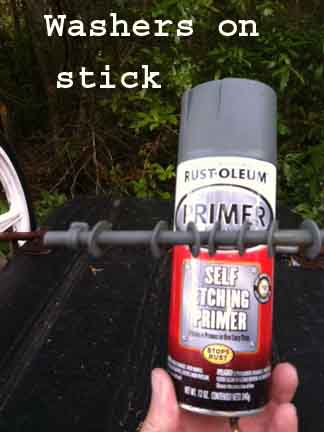
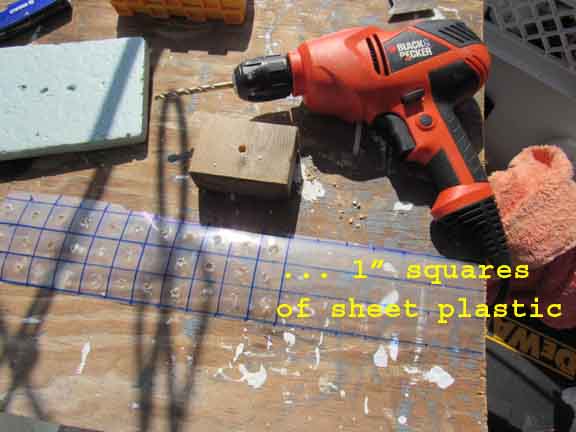
To minimize galvanic corrosion, I spayed the smaller 304 Stainless Steel washers with etching primer; and created plastic washers from sheet plastic. There were no 316 grade washers available at the five stores I checked in Southport, nor at the only vendor I found in Wilmington with 316 grade bolts. Even West Marine’s supply of “marine grade” bolts and washers were really 304 grade. True 316 doesn’t respond to a magnet. To see what zinc nuts do, check out the photo of the ones I used for temporary hand tightening the backer plates, and feet, into position.
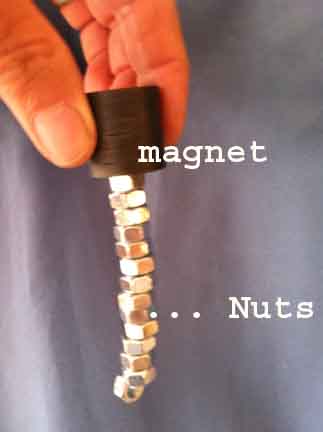
The more iron in the fastener, the more a magnet will lift. Stainless Steel grade 304 is slightly magnetic. Grade 316 shows no magnetic response.
To break the davit loose from the original caulk bedding, I utilized wedges that could be driven together. Making the supporting wooden rack was just a matter of repurposing scrap lumber.
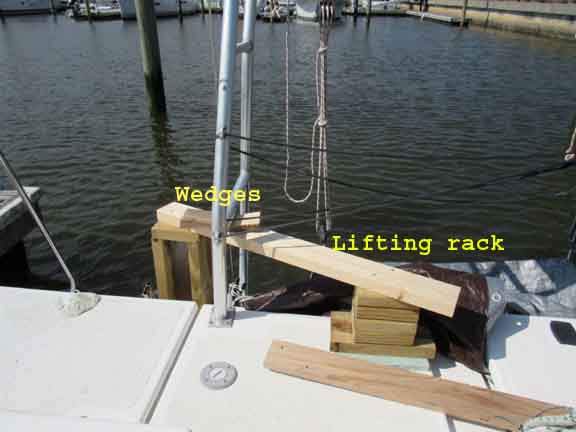
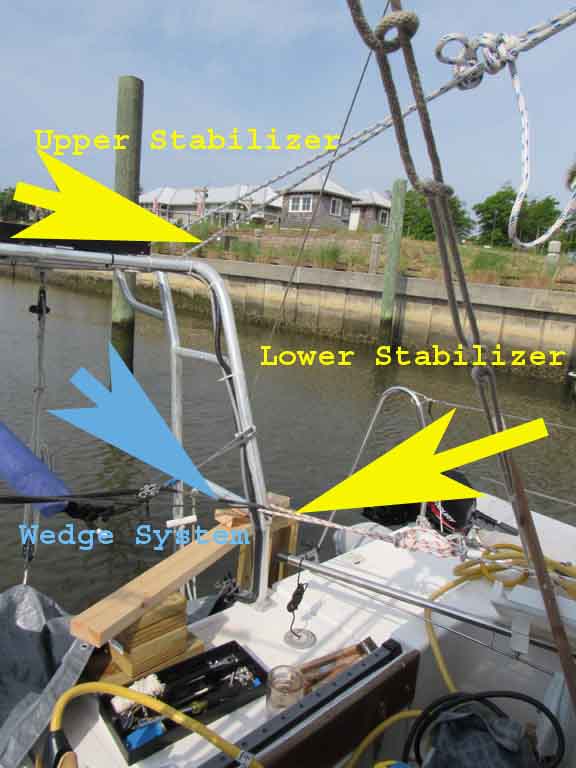
Since the davit system needed to be stabilized when the bolts were removed from the feet- upper and lower lines were run so the davit wouldn’t slide, or lean. Preventing the sliding would result in protecting the opposite side of the davit (still attached to the deck) from twisting.
Having used a trucker’s loop as part of the line attachment, tension could be adjusted- which worked well to match the existing holes in the upper feet to the corresponding deck holes.
Existing holes in the lower deck areas were filled with thickened epoxy. New holes were drilled to match the slight position change which occurred for the two lower davit feet.
Each side of the davit had to be raised multiple times:
Lift for access to clean old calk and do the epoxy work for the crack and fill drill holes;
Position new upper plates and drill holes for the four corner bolts;
Position the davit feet to the now temporarily installed plate, and mark the needed hole positions;
Remove the plate and drill the holes;
Reinstall the plate to match the holes of the corresponding backer plate; and finally
Elevate the feet so that the new backer plate (with 4200 on it) could be slid into position.
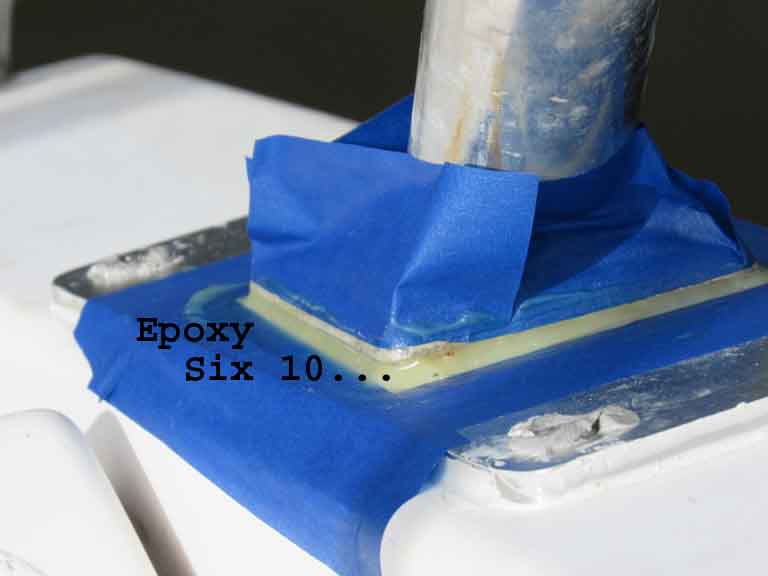
Once the new plates were installed, gaps under the davit feet were injected with West System “Six 10”. The resulting stability of the davit system is amazing.
Following is a copy of the spreadsheet I developed to be sure I didn’t get ahead of myself. When using 4200, you can’t have too much of a delay during the final installation process.
Work Plan for Davit reinforcement
Sequence
* Verify needed length of new bolts
* Acquire 16 1/4 bolts, washers, nuts for feet
* Acquire standard nuts for 24 1/4 bolts for temp hand tighten while positioning plates
1 Attempt placement of tarps under hulls to catch possible dropped tool, parts
2 Establish catchment method for sliding of plate off sugar scoop
3 Remove grill and worktop system
4 Eliminate twist of starboard davit feet by using non-stretch cord to spinnaker pulley bracket
5 Loosen port bolts
6 Clip zip ties holding accessory tubes and wiring
7 Elevate starboard side of davit
8 Remove bolts
9 Scrape old caulk
10 Position new top plates and mark for foot holes
11 Tape cracked fiberglass area and epoxy
12 While epoxy dries, verify fiberglass thickness and smoothness of underside
13 Drill plates for feet holes
14 Temp position top plate
15 Mark fiberglass for new corner holes
16 Remove top plate
17 Reverse drill thru gelcooat
18 Temp position top plate and drop in all bolts
19 Hand tighten four plate corners
20 Losely tighten 2 bolts for feet
Repeat items 4 thru 20 for port side
21 4200 the top plate and smooth area- avoid drill hole locations
22 Position top plate and install 2 diagonal bolts in feet
23 Use pipe cleaners to verify holes are clear
24 Drop in 2 diagonal outer bolts
25 4200 the bottom plate and position onto four pilot bolts
26 Use standard nuts on the diagonal corners to hold plate in place
27 Install balance of bolts and losely attach washers and nuts
Repeat items 20 thru 26 for starboard side
28 Lightly tighten all bolts
29 24 hours later, fully tighten bolts
30 Reinstall grill / worktop bar
31 New zip ties for accessories and wires
The story / blog of Yacht A Fun, a Gemini catamaran sailboat, traveling the ICW and east coast with insights to the extended cruising life. Dingy Davit Reinforcement