On Monday morning I was about to provide the generator some needed maintenance before cranking it for a test run. Our Gemini sailing catamaran has a switch to select power settings of: Shore; Off; and Generator. Theoretically if the switch is set for GEN, it prevents power from, at the same time, entering via the SHORE cord.
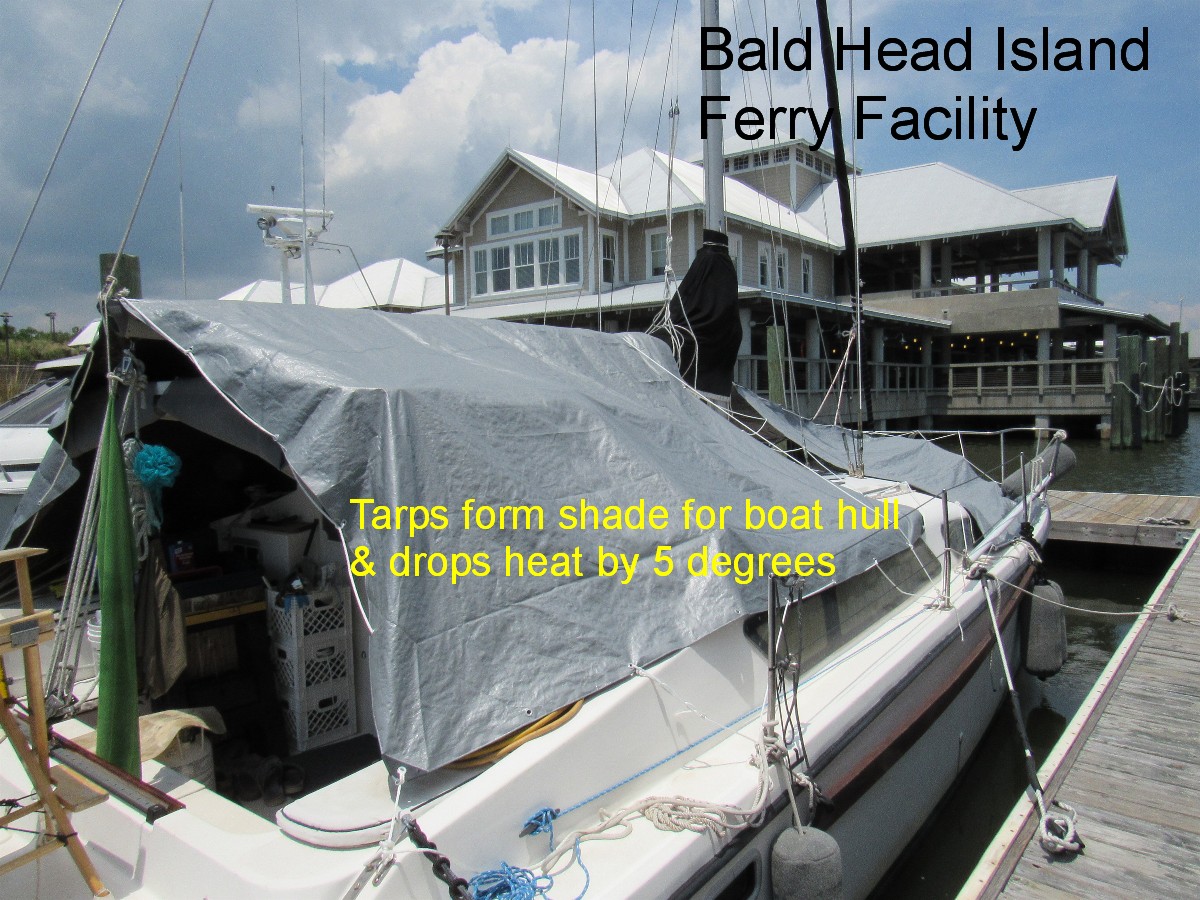
Sun tarp to shade Yacht A Fun
Being an admitted safety nut, I chose to shut down the dock’s power pedestal and also remove the 30 amp cord connection from its attachment point on the stern of Yacht A Fun. After removing the power cord I saw brown charring on the face of the cord and evidence of extreme heat on the face of the deck mounted connection. When I touched one of the metal flanges, it was so hot as to feel like a burn- far more than just “to hot to touch”.
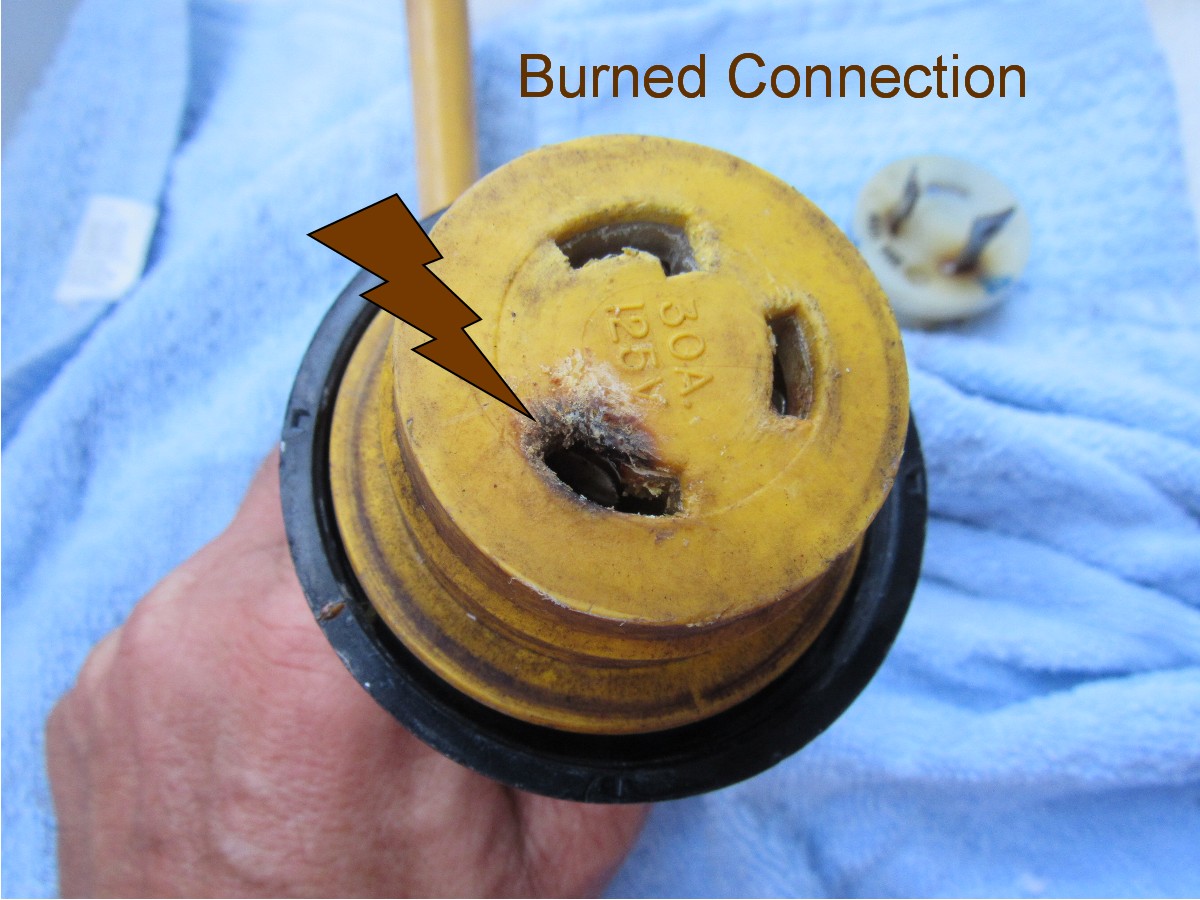
Charred Marinco 30 amp power cord
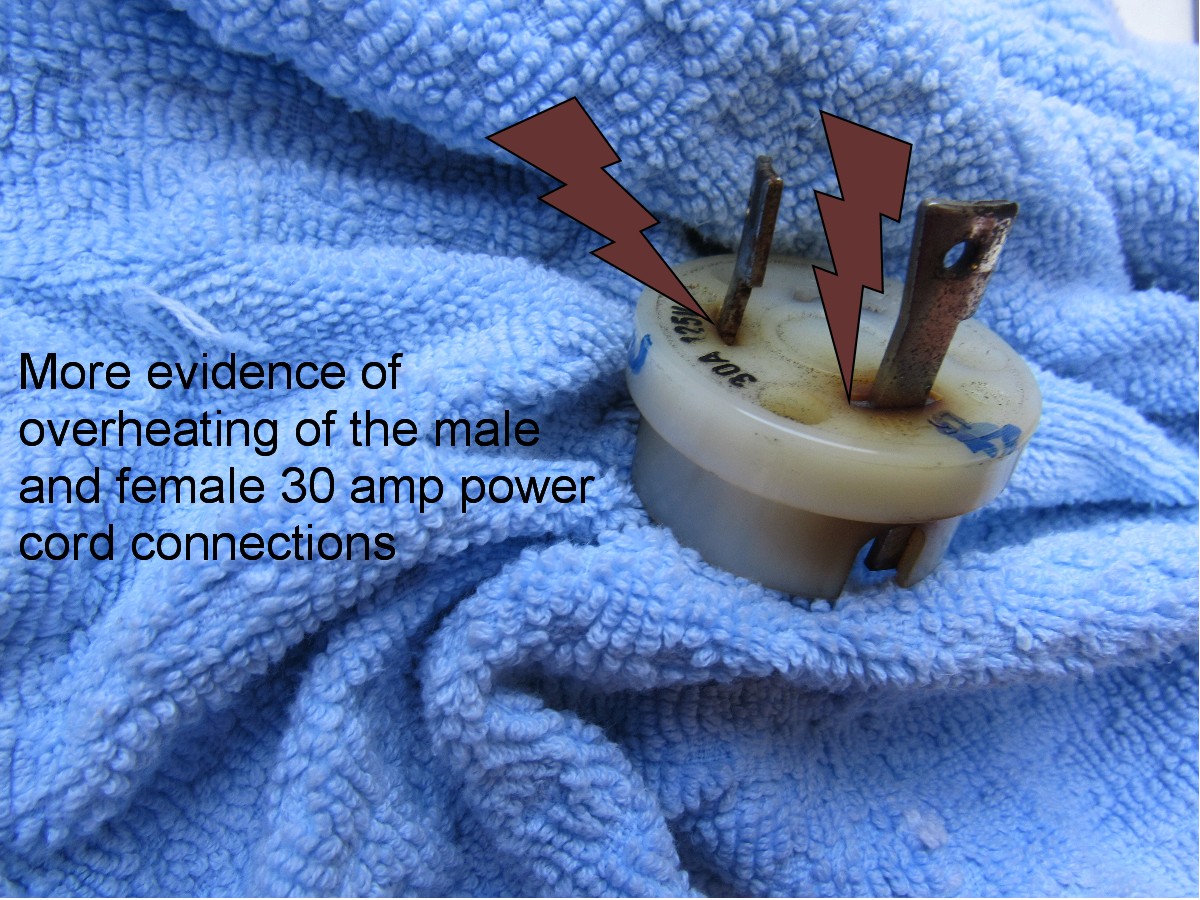
Metal prongs were to hot to touch for long
My attention shifted from working on the generator to replacing the two components of the 30 amp power system. While changing the boat mounted male plug connection, it made sense to upgrade the boat’s AC wiring to the panel box. The catamaran ’s manufacturer should have used at least 10 gauge wire ( such as Marinco does for the connecting power cords.) The smaller the gauge #, the larger the wire. 
Note- the daytime temperatures this week are in the low to mid 90’s. No power = no air conditioning!
One way of reducing electric cord heat is to shorten the length of wire serving the appliance, in this case the boat. I wanted to see if our (still serviceable) 50 foot Marinco 30 amp cord could reach the stern fitting by running directly to the boat vs. connecting on the dock to a second 50 foot cord. We were sooooo close. But three feet short is still a miss!
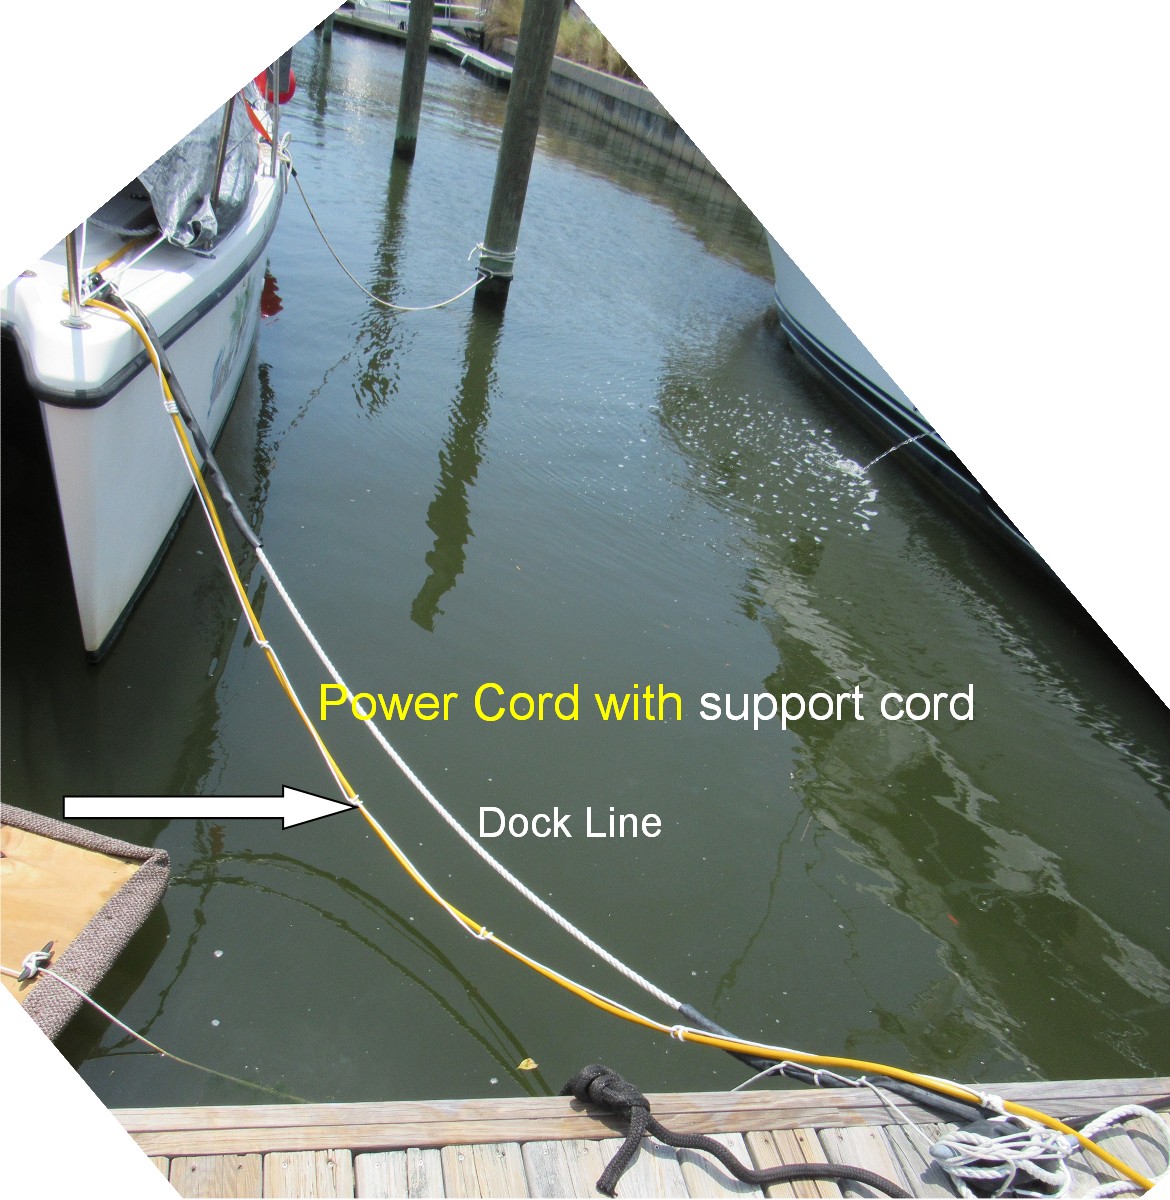
Swagged Marinco 30A cord supported by braded cord
A new 25 foot cord would make the connection and the total 75 foot run would be 25% less cord resistance than our previous pair of 50 foot cords. The shorter supply run would be one of two means to lessen the overheating potential for our electrical system.
Southport, NC is a great little town to spend a few weeks. It does not, however, have stores with extensive options of marine supplies. NAPA, for example, has 8 gauge wire that’s “tinned” for marine use- but it’s color coded for DC use, not AC installations. Cruising boats have mixed AC and DC systems. Color coding is very important for safety.
Monday afternoon in Southport, no hardware store, nor the retail marine facility I visited, had the specific parts that I needed. On Tuesday, West Marine in Wilmington did have all the parts I needed.
In contrast to West Marine’s reputation for being 20% higher than elsewhere, I found their pricing was as good, or better, than NAPA. The shore power cord was slightly less, the 8 gauge wiring was exactly the same ( and color coded for AC), and the male power plug component was close enough in price to not warrant a trip back to NAPA.
Diann and I had saved some $80 in West Marine coupons, which was a welcomed aspect of our parts purchase.
From West Marine we went to Harbor Freight to acquire items such as a cheap heat gun to use on shrink wrap tubing for the new wiring splices;
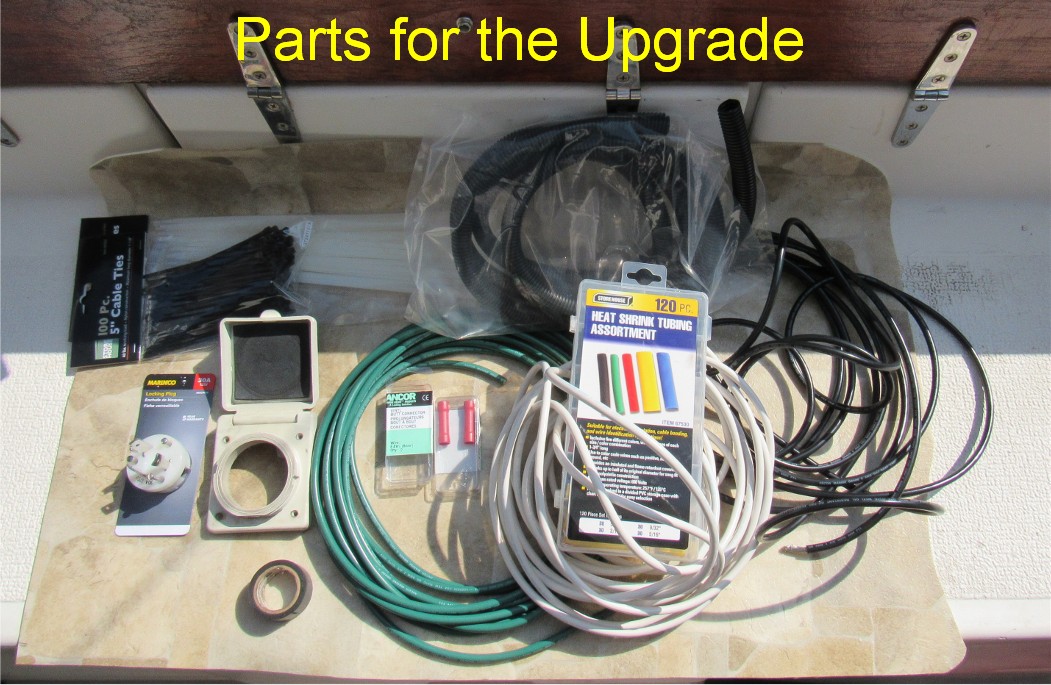
New 8 gauge wire and other materials for the upgrade (original deck fitting box is in image)
The “F&S” (fatigue and sweat) Sequence began Tuesday afternoon about 3:30. The Tuesday / Wednesday process pretty much ran:
Opened the deck hatches, turned on the DC Battery Inverter, powered up the box fan for interior air flow;
Removed the panel covering the catamaran ‘s DC / AC wiring system;
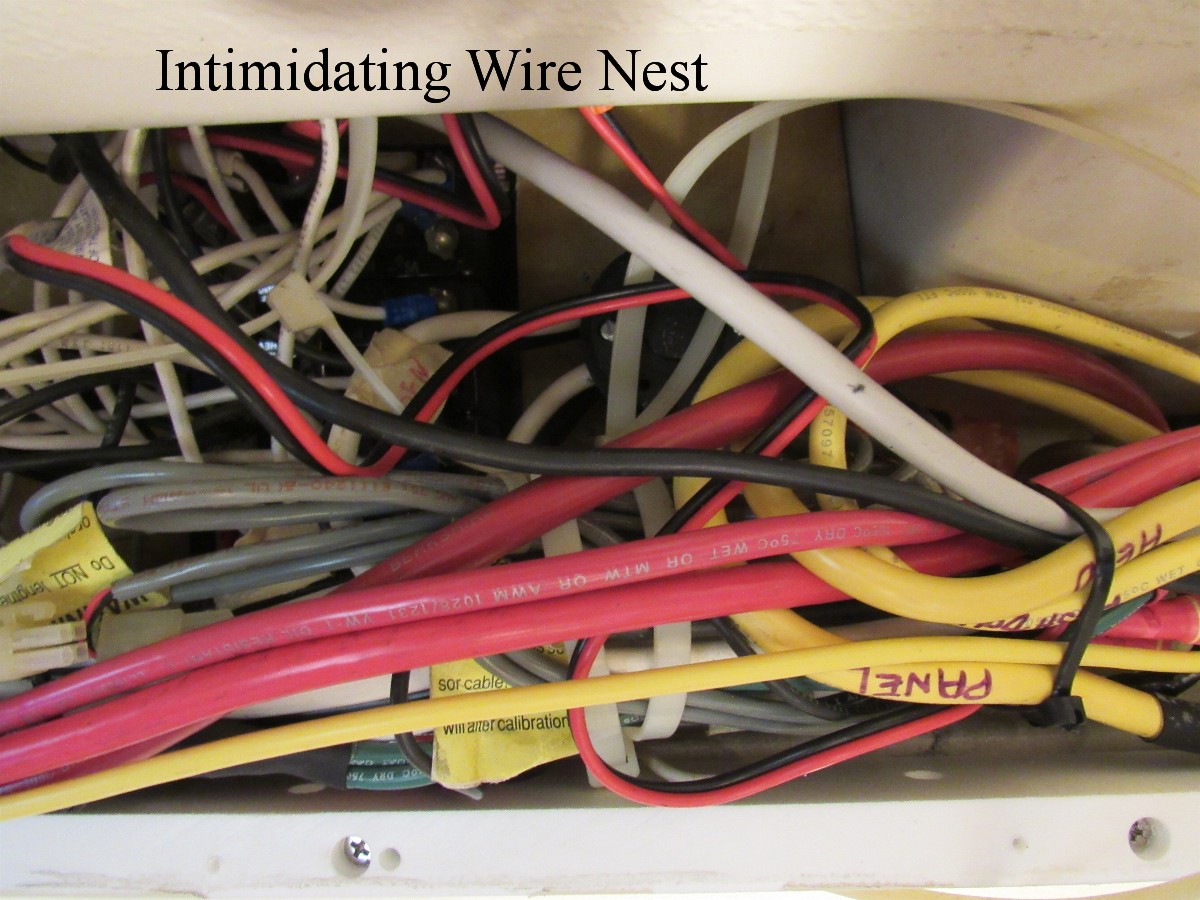
Gemini Catamaran wiring system behind the breaker panel
Removed the charred male power plug component from the interior of the deck mounting bracket;
Traced its connecting wire to the interior of the propane locker and further to the thickest most effective caulking of a thru-bulkhead location I’ve experienced. The caulk also was in place for the exiting propane line and other electrical lines. The decision was made to not try to pick / cut the caulk out to make room for new wire (the risk of collateral damage was too great);
Pulled out all the items stored in the port berth and placed them in the walkway to the head, thus making potty trips an adventure;
Moved and curled the mattress to the side of its platform so as to be able to pull the wall liner cloths from the berth’s adjoining area of the propane locker’s port side;
Verified the locations of deck and locker surfaces;
Measured the best spot within the propane locker to drill a new AC power cord pass-thru hole;
Returned to the port berth and marked the estimated location for the hole and confirmed it to be a viable passage for the new wiring;
Drilled a small pilot hole thru the locker wall and left the bit for inspection from the port berth;
Then drilled a one inch diameter hole thru the fiberglass of the propane locker’s port side only to learn that it was not solid fiberglass but rather gel coat covered plywood. (Raw plywood will eventually delaminate and rot.);
Mixed up a small batch of epoxy and via Q-tips coated the hole’s interior;
Stretched the three strands of 8 gauge wire along the dock;
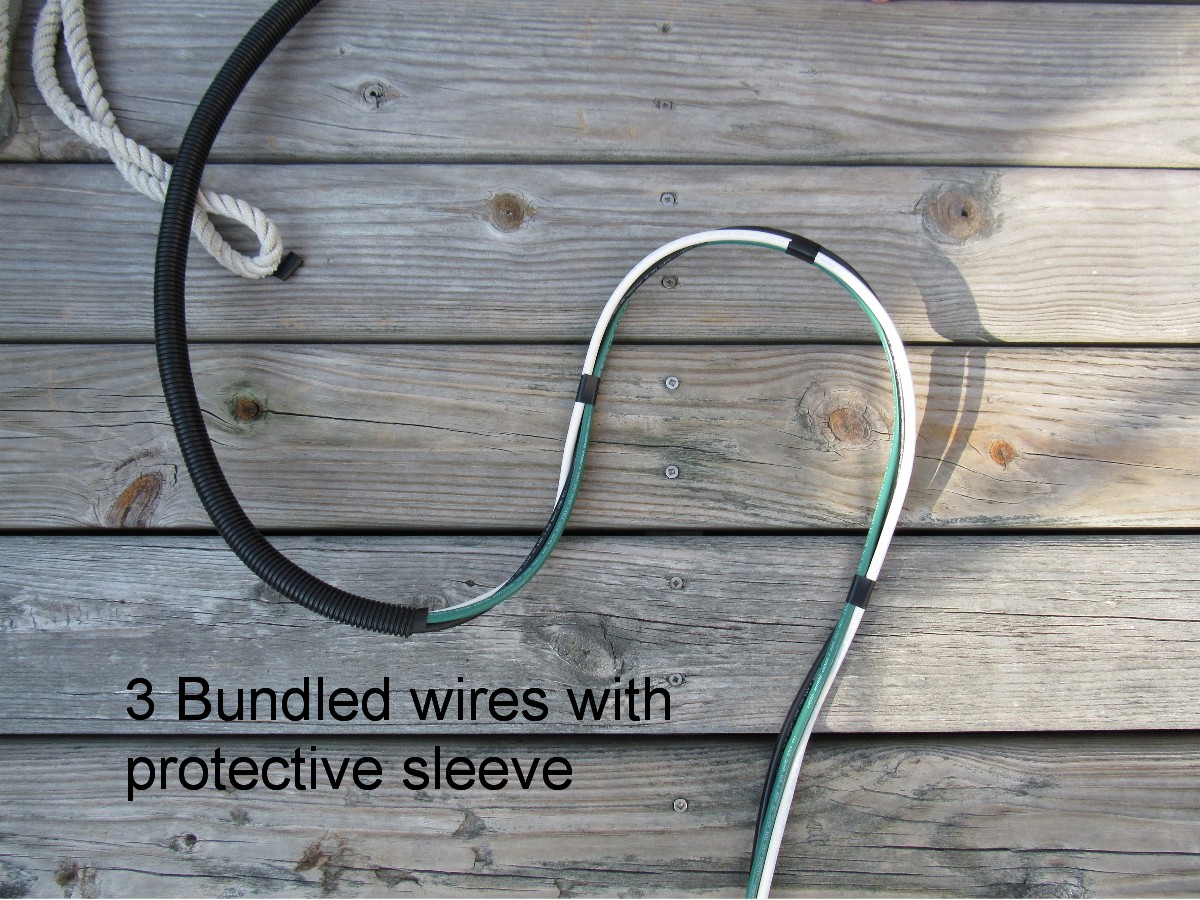
Diann and I then used electrician’s tape to bundle the three wires into a triangular oriented run which would fit within a corrugated sleeve protective covering;
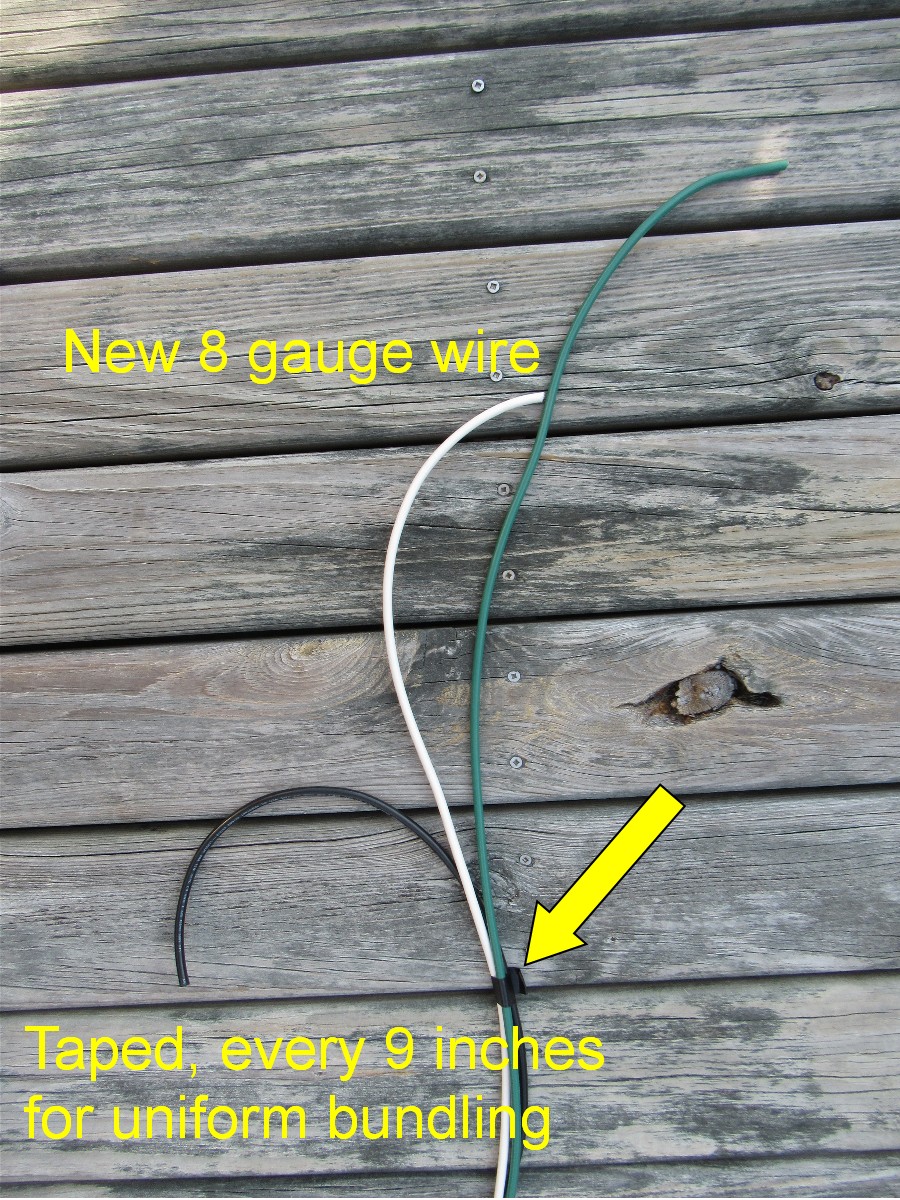
Three strands of 8 gauge wire bundled to form a triangle shape
We passed the deck fitting’s “plug end” of the wiring cable assembly from the berth into the propane locker;
A short length of bicycle inner tube was passed over the assembly to provide a separation for the wiring sleeve and the still wet epoxy of the thru hole;
A cord was tied to the end of the assembly and “snaked’ thru the original wire’s access hole thru the starboard side of the propane locker, back to the deck fitting opening;
Our table lamp was plugged into the inverter. It was dark outside and flashlights just weren’t enough illumination anymore;
Wire ties were used to attach the wiring assembly to the steering cable run we had done in May. The steering cable being stiff, and itself attached to the hull interior, it made a good support for the new wiring;
Diann and I stared at the nest of wires in front of us and spent a fair amount of time to double check the old AC wiring as it connected to the wire leading to the Shore/Generator selector switch. Eureka- we saw a previously unseen label which read “shore power”. Once comfortable we had the right “triplex” wire in hand, we cut it and tied on a cord to create a fish for later pulling up the replacement wiring assembly. Due to the hidden aspect of the wiring, as it leaves the access panel, a fish is absolutely necessary for getting a wire back up from the port berth bridge deck area;
Once that wire was cut and pulled down, into the port berth bridge deck opening, I wanted to be absolutely sure we had the right wire before splicing a 30 amp circuit into the receiving wires. Using the dinghy’s 12 volt battery, as a source of electricity, we applied a voltage tester to the other ends of the cut cable. Thank goodness for the peace of mind that gave;
Some of the previously wrapped shielding sleeve was not needed and so was removed and saved. The three strands of 8 gauge wire were then taped and the fish cord attached. Diann guided the wire up behind the wall panel as I pulled from the upper area;
Wire ends were skinned, Heat Shrink Tubes were slid (but not yet heated) over the wire, Dielectric grease ( for corrosion prevention) was applied to the wire ends, and the tinned crimp fittings installed;
Diann and I took the table lamp out to the stern of the boat and suddenly I realized it was 8:45 PM and I was late in taking my meds. So, I took a short break which allowed me to realize just how tired I had become and how sweat saturated my clothing was;
I sat back down to complete the wiring process and thereby turn on the electricity which would provide air conditioning to sleep in. But, as I tried to slide the 8 gauge wires into the three holes of the retainer base for the male plug they wouldn’t slide in- the holes had been sized for a 10 gauge, or smaller, wire.
The dilemma at 9PM- should a fatigued person (also hungry) attempt to make judgment calls about just which tool and technique to use for completing the project- or should he call it quits and begin fresh the next morning?
Fresh the next morning won the discussion with Diann- which meant another night of sleeping without a/c and without much breeze stirring.
We transitioned to getting cleaned up and going out to dinner…….
Cold beverages are good when one is tired and dehydrated. A warm cleansing shower adds to the relaxation. Dry, clean, clothing is also positive. Fantasizing about Mexican food can enhance expectations.
On the way to the Jeep we stopped to finish our second beers while sitting by the pool. It felt good to just stop and rest while enjoying each other’s company.
We arrived at the Mexican restaurant at exactly 10PM which is exactly when they close. And no other restaurants were open except McDonald’s – we know because we rode around for 30 minutes trying to find one ! If we were in Coconut Grove / Miami we could have found great dining until 1AM or so. We laughed about the differences.
Though our meal was not a treat- sleep came easy.
Wednesday morning I made iced coffee- my first made at home that I can remember.
Using a Dremel grinding pencil, I enlarged the three holes for the male plug base;
With a little oomph, and finesse, the parts came together with the requisite Dielectric grease in the process;
The new Marinco 30 amp power cord was attached to the new deck fitting;

Marinco 30A EEL shorepower cord connected to deck fitting
That new 25 foot cord was attached to the existing 50 foot cord which was already attached to the pedestal; 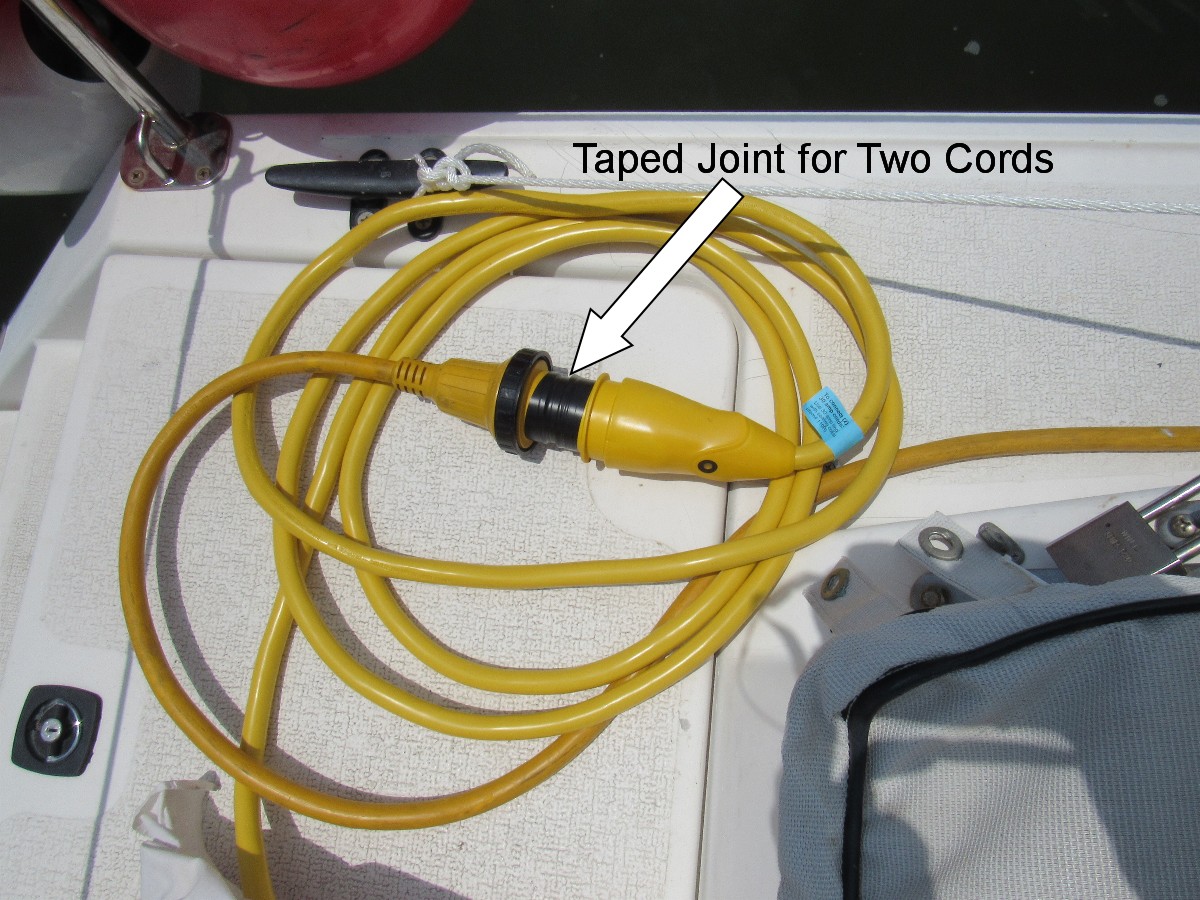
The pedestal breaker was flipped on;
Yacht A Fun ’s breaker was flipped on, and the a/c breaker flipped on- but no response !
Out came the electric tester and the power to the crimp connectors was verified;
AH HA- the SHORE/GEN selector switch was still in the off position. Once switched over, the air conditioner began its job. I don’t know whether I felt more foolish for having not earlier turned the SHORE/GEN switch, or felt more glad that the major part of the process had created cooling results!
Diann and I put all the tools away and I headed for a swim in the pool and a shower.
Later, curiosity got the better of me and I just had to see how damaged the female cord end had been. I hack sawed off the yellow cover end and revealed an area of melted plastic interior. Though I sawed that area, too, I soon found that the end is made as a solid part. My interpretation is that once the cord end shows charring, you have no idea how far back the damage has gone. 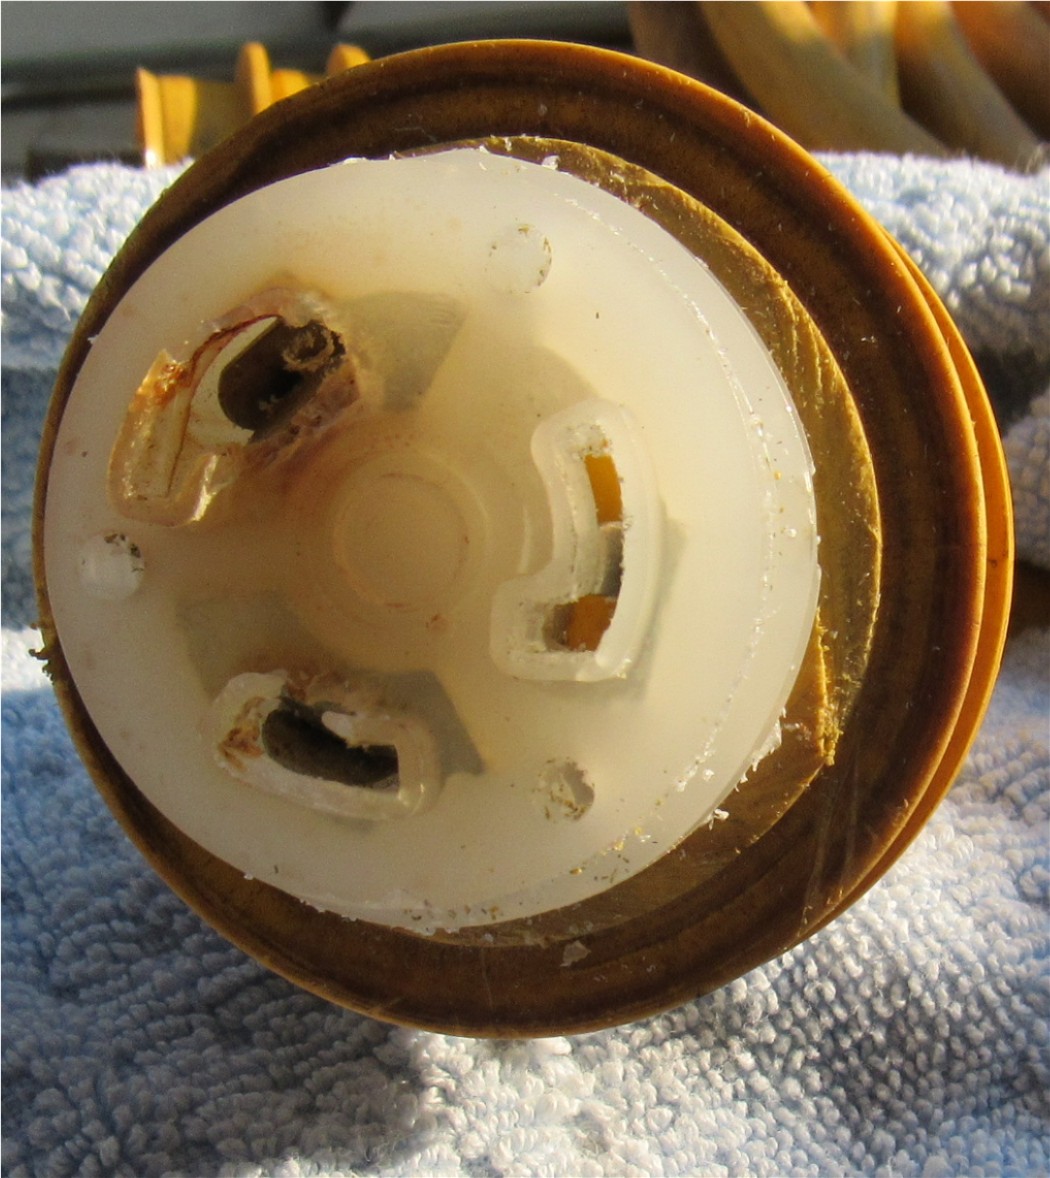
At mid afternoon it was 96 degrees in the shade ! Blogging in the cool is a good thing.
Tomorrow I’ll heat shrink the crimp fittings, bundle up the wires, and put back the panel cover. That work will be done in a much cooler boat.
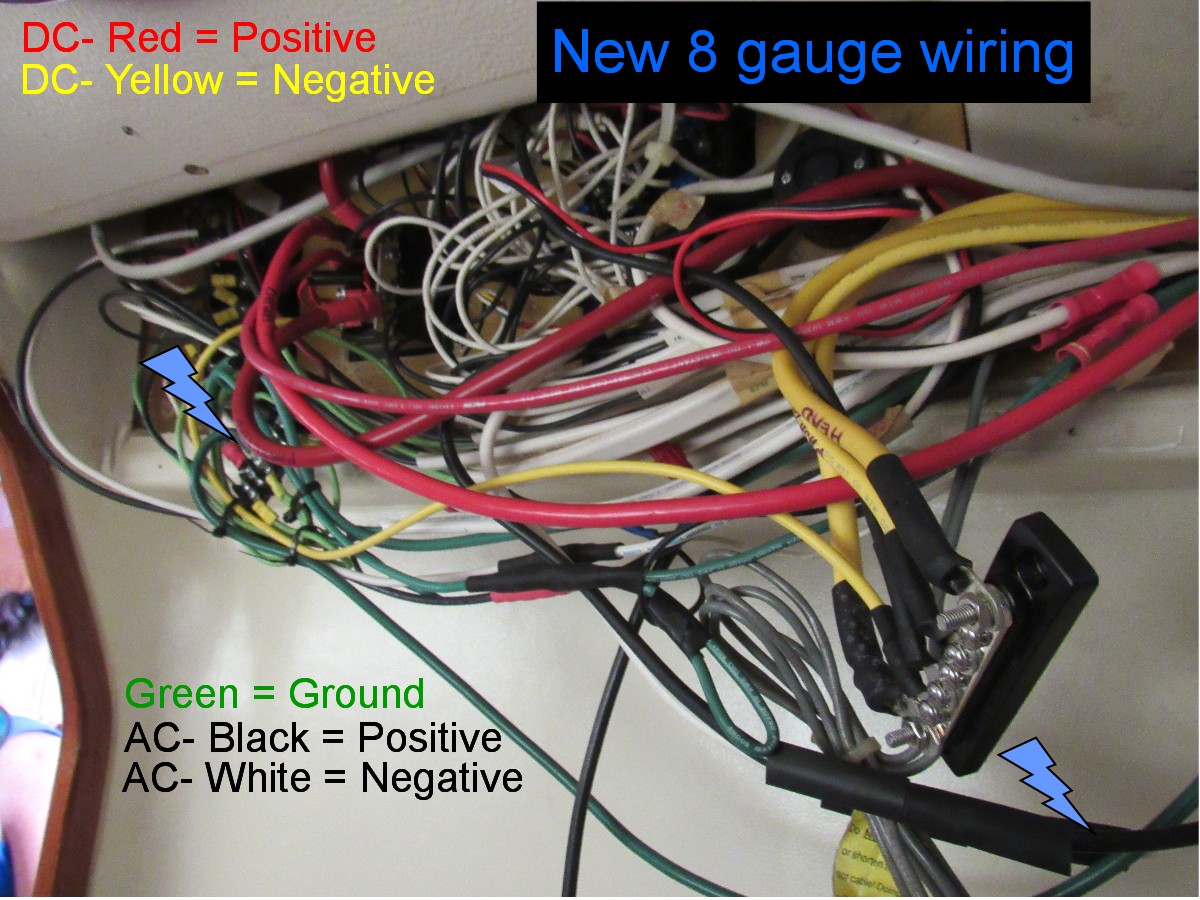
DC and AC Wiring of the Gemini Catamaran
Comments 1
Alex – I feel your pain brother. Been there and have the t-shirt. Unfortunately you may go through this again as sometimes the damage is done by badly wired dock power pedestals and surges. We have lost 2 expensive shore power cords, one of them almost brand new, to badly maintained pedestals. I hope the best for yours. We’ve decided to try not to plug in to any marina power and to only use solar if possible.
Great report – appreciate the detail!
Deb
S/V Kintala
http://www.theretirementproject.blogspot.com